Marc set me me off on the microscope slide trail in the early days of our friendship, now over 5 years strong. However, as you know from our many experiments during that time we have had mixed results with them. Last time we got together just before Christmas I got sooooooooo frustrated and impatient you wouldn’t believe, I think Marc got scared!!!!! But I won’t be beaten……
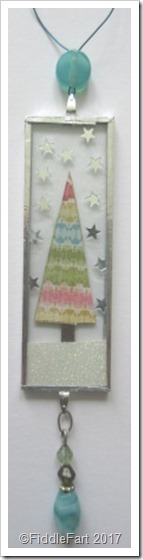
My frustration has always been wanting to do something that was double sided and finding a delicate, unobtrusive way of fixing a loop of some kind to hang extra twiddly bits from the bottom and a thread/or wire to hang the finished decoration at the top, until now, all my efforts, in my eyes, have just looked too clunky!

However, while searching through the jewellery making listings on e-bay I finally found what I was looking for, spring bail pendant findings! So yesterday, I sat down and tried all over again …….
I decided, to achieve an easy two sided effect I needed to leave some of the microscope slide clear, in this case the sky. I made a tree template and was originally going to use the green side of the paper, but when I saw the patterned side I thought I would try it instead. I cut out two trees and stuck them together, with a tiny scrap of brown sandwiched in the middle for the trunk.
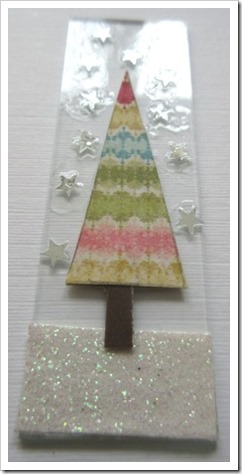
I did the same with the glittered paper on the bottom and then added tiny, silver stars to completed the double sided look.

However, that’s when my awful, awful, impatience kicked in ……. I used a tiny amount of Aleene’s Pendant Gel to hold the stars in place, but instead of waiting for it to dry I sealed the two microscope slides together with 6mm adhesive, silver metal tape while it was still wet! Marc would have slapped my hand so hard and told me off something rotten …….. however, I will justify my actions by saying ….. that it was just an experiment piece!!!! An experiment when I really wanted to see if the spring bails worked!
And this was the moment when I dared glue them, one at the bottom and one at the top with a tiny, tiny amount of E6000 glue.

I will admit to scrapping off the excess, very carefully with a pin, while the glue was still setting, but I knew if I let it “cure” and then tried to remove it, disaster would undoubtedly happen, but after that, I left the slide well alone to dry unhindered and unpoked, occupying myself with something else instead.
I managed to leave the slide alone for about four hours when the glue and bails were well and truly stuck, then gingerly added a drop of coordinating beads from a charity shop bracelet I featured a week or so ago to the bottom and another bead on some teal jewellery wire to make a hanger for the top!
Success at last ….. after 4/5 years of trying so hard, I have finally made the microscope slide I have always aspired to!
However:- sealing the slides together before the stars had dried WAS a big no no ….. but as an experiment I discovered that I had used far too much pendant gel anyway …… so when I made another one, almost straight away, the lessons learned paid off. This time when gluing the stars I used the tiniest spot of pva glue ever, I mean really tiny, gently laying the star on top, with no pressing down, because that would have squeezed glue around the star causing smudging around it, this way the microscope glass remained clean.
A steep learning curve, but so worth it …… I can now steam ahead and make a huge pile of slides for Christmas 2017 using many variations, knowing that I have finally got the basic technique right!
 The inspiration for this card came from the triangle charms taken off this charity shop find bracelet. It was the triangles that caught my eye, but the bracelet has been languishing in my jewellery boxes of bits for a couple of years now, until the other day when I wondered if the textured, metal pyramids could possibly be turned into Christmas trees.
 And I can’t believe how brilliant they look on a very less is more card, set on a gold mat and layered panel …….
 …… with the trees topped with a tiny, bronze coloured star.
 I was going to leave it at that, leaving the holes as they were, but when I went back and looked again, I decided a tiny flat back pearl would just be the perfect finishing touch.
 I am so chuffed with how this card has turn out, I think it has to be one of my all time favourites!!


