This is No. 3 of my 12 Days of Christmas patchwork shadow box frame with which I plan to deck my festive halls for Christmas 2017.
When I mess about trying to decide where to put the tiniest and most insignificant of flat back gem I call it Fiddle Farting, hence the name of the blog!!!
Monday, 8 May 2017
The Twelve Frames Of Christmas – Festive Patchwork Box Frame Decorations - No. 3
Saturday, 6 May 2017
Sharpie Painted Plate
This plate was just pure relaxation, adult colouring books don’t really do it for me, if I used one colour that I thought looked wrong I would just get disgruntled and the page left as it was to annoy me, but just doodling and colouring as I went along certainly soothed this savage beast!
I used an old Ikea plate (diameter 19.5cms) I already had in the cupboard, it was a little scratched, but it was soon covered up.
I used Sharpie pens for the design.
POST NOTE: Before baking in the oven, I let the plate dry for about 48 hours to make sure it was really dry, I then baked it slowly in the oven at 130c for two hours after reading several articles on the net on the best ways preserve/secure the ink from the rigours of washing up - http://www.destinationdecoration.com/the-ultimate-guide-to-sharpie-mugs/ - however, this did not work, the temperature was not hot enough and an awful lot of the design came off in the first wash ........ I am now in the process of more experimentation, however, with a higher temperature comes risk the fading of the pre-baked brilliant colours ....... (please also see added comment left by anonymous reader below)
Re my ink adhering problems, this comment was left in my comment box, for which I am very grateful ..........
"That is GORGEOUS! I don't know if this will help, I've tried using Sharpie markers before and found they didn't "bond" to the ceramic, when I looked into it I found that most of the tutorials I'd read were American and their "standard" Sharpies seem to be different to ours (from memory I think it was something to do with alcohol content) I found some UK bloggers had had success by giving the ceramic a light sand before colouring in but even then they'd had issues. Hope your experiments go well and you find a technique that works, the plate is lovely & I'd love to have a go again. Maybe any overseas readers can help as they don't seem to have the problems we do in the UK. If all else fails you used to be able to buy a clear glass paint that you baked in the oven (it was designed to be used to tint and lighten coloured glass paints) - a layer of this would seal the design but can't remember if it was food safe or not? Good luck with your experiments."
Thursday, 4 May 2017
Large Frankenstein Halloween Fridge Magnet
This is not my original idea, I found it on Pinterest http://thisgirlslifeblog.com/2015/10/popsicle-stick-frankenstein-craft.html#more-7503….. and then pinned it to my Inspiration Board. In my using of the idea I have made a couple of small changes.
I was a bit confused as to where Frankenstein has his bolts, on his temples or through his neck, in the end I chose the later, cutting them from mirror card, to secure them, then I decided to go the whole hog of fiddle fart and covered the white card with silver and then secured the bolts with the same. It just just looks neater. I also added a piece of self adhesive magnet tape, so it could be put on a fridge etc..
I used two sizes of googly eyes for extra comic effect and then threw caution to the wind by accentuating Frankenstein's hair and facial features with Ranger Glossy Accents, it really worked well, especially on his hair.
Tuesday, 2 May 2017
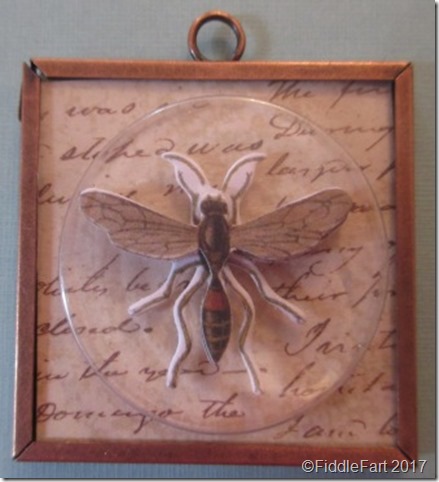
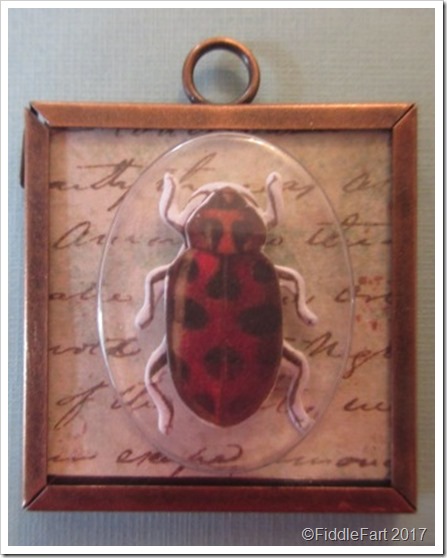
Insect Memory Frame Pendants
I cannot tell you how thrilled I am with these Memory Frame Pendants. They have been a very long time in the making, as I have had the Ranger Inkssentials Memory Frames for too many years to remember, so long in fact that I think they are now discontinued and if there are any still available they will be few and far between.
So much of my crafty stuff had to find new homes when I moved, I am so glad these bits didn’t. I shall be keeping my eye on eBay just in case any frames crop up, but I think it will be increasingly doubtful.
Sunday, 30 April 2017
Sharpie Pen–Birthday Plate
The original idea for this plate comes from Pinterest https://uk.pinterest.com/pin/210332245070608988/
This plate, originally from Ikea measures 19.5cms in diameter, so I would think I would probably describe it as a large tea plate.
There’s not a great deal to it really, I started off by drawing the basic design on the plate with a black Sharpie pen ……..
……. and then gradually filling it in with all the other Sharpie colours I have, adding random doodles and and spots as well as filling in the candles.
Before baking in the oven I let the plate dry thoroughly about 48 hours to make sure it was really dry, then I baked it slowly in the oven at 130c for two hours after reading several articles on the net on the best ways preserve/secure the ink from the rigours of washing up - http://www.destinationdecoration.com/the-ultimate-guide-to-sharpie-mugs/
Post Note: I had to experiment with the baking time and temperature of this plate after the ink failed to adhere on a previous plate. I increased the temperature between 180/200 in an electric oven, baking for about two hours. The ink set ……. but the colours faded considerably, as the picture below illustrates.
Me thinks more experimentation needed …… perhaps a high temperature but a lot less time? I won’t let this beat me!
Friday, 28 April 2017
Pink Popsicle/Lolly Stick Sugar Plum Fairy Christmas Tree Decoration
Following from my first lolly stick ballerina, this is my second attempt, turning the ballerina into a fairy.
Wednesday, 26 April 2017
Halloween Snake Trick Or Treat Plaque
This is what happens when an Easter Egg Hunt plaque goes terribly wrong!
It started with a sorry tale of my trying to remove a sticky price tag and ending up removing almost all of the front instead!
The plaque measures approximately 13cms x 6cms. It only cost 69p, but I couldn’t just throw it away ….. so thinking about how much fun I had had making my Halloween snake and spider door wreath, I thought I might as well try to use the snakes and a few skeleton hands I still had left it …… my brain sometimes makes some very weird connections!
I removed the ribbon and covered the front with a scrap of orange paper, adding the hands and snakes in intertwined layers using a glue gun and deciding not to remove any threads from the glue for added effect.
I then glued on small, red, flat back gems for the snakes eyes, a few tiny gold stars on the orange paper in between the wigglies, and a few smudges of green Sharpie pen on the fingers.
To be honest, I didn’t know where I was going with the plaque, but it was at this stage that I decided to add a handwritten Trick or Treat on three ripped scraps of black card using a white gel pen.
…… and then the idea of “hiding” sweets amongst the snakes and hands as a dare for little fingers to try and fish them out hit me, all the more creepy in a dimly lit room! Nearer the time I will get some more chocolate coins, as I only had one to try as the idea came to me, oh and a boiled sweet!
I need to attach a ribbon to hang the plaque from, or a strong magnet, but that can wait till Halloween too.
Now, what can I do with about 30 neon coloured skeletons …….. bunting?
Monday, 24 April 2017
The Twelve Frames Of Christmas – Festive Patchwork Box Frame Decorations - No. 2
This is the second patchwork Christmas Shadow Box Frame I have made to “deck” my festive hallway this Christmas …… just another ten to go!
For this undertaking I plan to use the Ikea Ribba box frames (£3.50) I already have hanging in my hall by just swopping the centre panels for the month of December.
On this one I mostly used some of the wooden embellishments that I already had and then added an assortment of flat backed gems, googly eyes and a little Ranger Glossy Accents here and there to add the over the top look you can only get away with at Christmas.
I think I can get away with using a few repeat embellishments in several of the frames. When I have completed the back log of frames for January until April I will only have one frame to do each month, and then hopefully new ways and products for filling the squares will come to me, I reckon I will get more detailed, and then want to do the first few again!
Saturday, 22 April 2017
Popsicle Stick Ballerina
This is not my original idea, I found it and then pinned it on my Inspiration Board on Pinterest https://www.instagram.com/p/BAOW-BBMZop/
I then drew on the face, top and shoes with a pink Sharpie pen and black fine liner pen.
The skirt is made from three pink cake cases, one on top of each other and folded in half. I made a small slit in the centre of the fold with a craft knife, to push the stick through. I then added a little blob of glue to the stick and each layer to help keep them in place.
The finishing touches were a flat back flower gem on the ballerina’s hair and tiny gems on her décolletage and slippers. I could gone totally overboard by adding more gems to her dress, but decided to stop there, to gauge madams reaction first.
But, I am now thinking …….. Christmas fairies, made in the same way but using white cake cases instead, with silver wings, and a lot more bling?
Thursday, 20 April 2017
Sharpie Pen - Snowman Christmas Plate
The original inspiration idea for this Christmas Plate came from Pinterest - https://uk.pinterest.com/pin/332984966186944740/
I haven’t painted a Christmas plate for a couple of years, but I thought that having one or two squirrelled away might be useful “if” I have a craft stall later on in the year, and if not, I could always give them as presents.
I was nervous about doing the face, but I knew I had a short amount of time to rub out the pen if things didn’t look right, fortunately it only took three attempts to do the nose and two for the mouth before I was happy.
I found the dinner sized plate in Poundland, I loved the ribbed edge, thinking that it would add an extra texture to the finished design. I used Sharpie pens to paint it, and was going to measure the stripes round the edge, but soon gave the idea up, if this was to be hand painted, a few wobbles and uneven spaces here and there wouldn’t do it any harm.
I drew the stripes in red as a rough guide and then gradually filled them in, colouring them in randomly round the plate so as not to smudge areas that might still be a bit wet.
I then added the snow border in the slope of the plate, this was fiddly, and if I am being critical, it may have looked better in a paler blue colour.
With that done, I then added black spots round the edge of the plate in the areas that I had left blank.
The final touch was, after some thought, to colour the white snow, pale blue.
After a little research on using Sharpie pens on plates etc. to help set/secure the ink, I baked it very slowly at 130c for two hours, keeping a careful eye on it. That being said I wouldn’t trust the plate in a dishwasher, but would wash it very gently by hand, but being a Christmas plate I wouldn’t anticipate it getting very heavily caked in food, I am thinking mainly biscuits or mince pies?
Post Note; I made several plates at the same time - one plate I was planning to use on a regular basis but on the very first wash the pen came off without too much effort - I thought 130o didn't sound very hot. I am now going to use this plate to experiment with at various increasing temperatures until the pattern "hopefully" stay puts, and then I will revise any future posts.
Subscribe to:
Posts (Atom)