Friday, 11 August 2017

Christmas House Tags

The jury’s out on these tags, I confess I got carried away, but for me the results are just too over the top. I don’t think all the silver filigree works, but then again I am very less is more, and for some people, especially at Christmas, a little more is never enough!
IMG_3786I used children’s wooden picture dominoes as a base of the tags, something strong and long lasting, so that perhaps they can be hung on the Christmas tree in the the future, as a memory of Christmas 2017.
IMG_3716IMG_3718
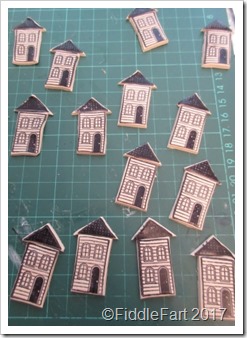
I stamped the Stampin’Up house stamps directly onto rolled out, beige coloured Fimo, which were carefully cut out and baked.
IMG_3724When the Fimo  houses were “cooked” the tags were gradually built up, it was at the final stage that I got a little unstuck, there was too much empty space and I was determined to fill it ……..
Christmas House Tag…… but it all became a bit pearls and filigree akimbo …. plus for good measure, a path of Ranger Enamel Accents! Hmmmmm, too much, too much!
House In The Snow Christmas TagI wonder if the houses may have looked more subtle against the blue and white if I had used a pale grey Fimo instead, as an experiment I coloured one in with a grey Sharpie pen, and I am still not sure!
I left the sides and back as they were showing the natural wood, although I did do a little faux stitching, using a black fine liner pen round the edges of the back to give the tags a more finished look.
There’s lots of ifs and buts  with this idea that I could twiddle with, flatter, silver peel offs in the corners perhaps, a sentiment at the bottom ….. if I wanted,  however on this occasion, this is not a project I think I will be revisiting.

Wednesday, 9 August 2017

Walnut Shell Christmas Tree Decoration

This is an idea I have been thinking about for ages, in fact I bought the walnuts last Christmas, I just never got round to using or eating them, but this year I am starting early with my Christmas crafting.
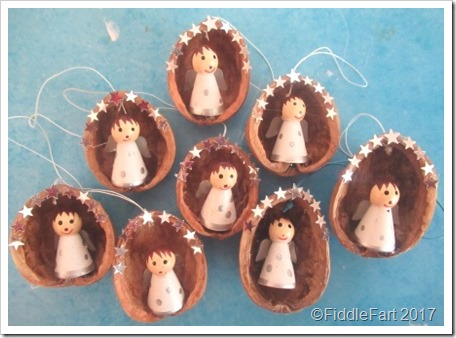
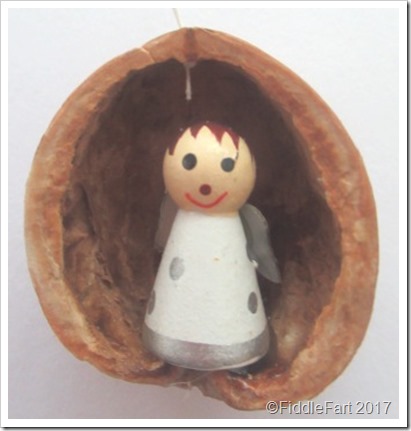
Angels in Walnut Shells Christmas Tree Decorations I got the idea from Pinterest and really, for my version, there’s not an awful lot to them. All I used were walnut shell halves, angels taken from a charity shop find, some strong white cotton thread, a  few stars and E6000 glue.
Angel-Christmas-Tree-decoration_thum[3]IMG_3963
After halving the walnuts and removing the contents I drilled a hole in the pointed end of the shell. I then threaded the cotton through the hole to hang the decoration from, this was the most fiddly part, and made my eyes cross even more than usual!
IMG_3953Next I glued the angel in the middle of the shell using E6000, because I needed a really strong bond.
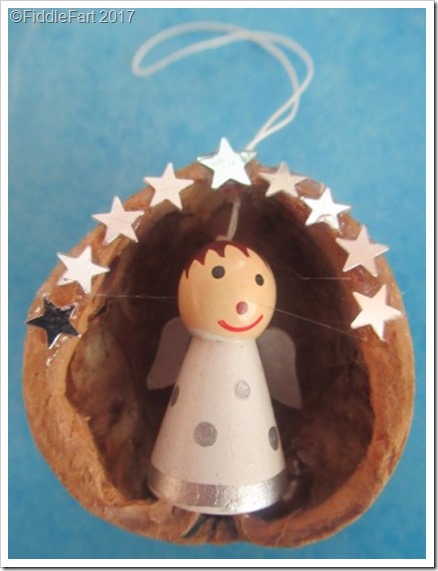
walnut shell ornaments Christmas AngelAnd the finishing touch……  a bit of an after thought, adding tiny silver stars around the top of the shell.  The top middle star is ever so slightly bigger than the others. I glued them with E6000 because PVA didn’t stick them securely enough.
Et voila!  I am now bursting with ideas for what else I can put in other shells, I am thinking ….. nativity scene made using Fimo, so be prepared for my crossed eyed look to continue for a while!

Monday, 7 August 2017

Jewelled Oval Mirror

Hmmmmm, not too sure about this one, at the moment …….
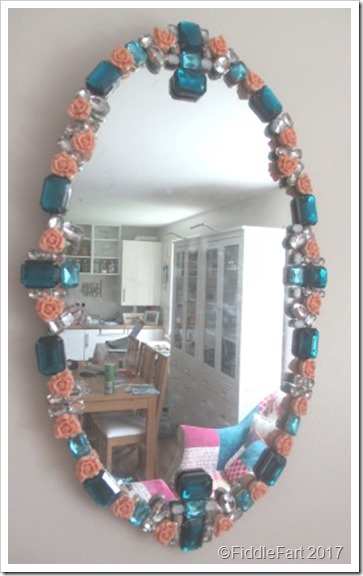
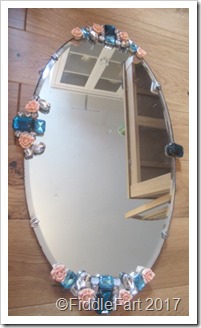
When my father-in-laws house was being cleared to sell last year, I asked if I could have the oval mirror that had hung in the dining room forever, it had no value, but I hoped that in time I could breath new life into it, so that it could continue live on, all be it in a different guise, hopefully somewhere in my new home.
Jewelled MirrorThe mirror measures approximately 58cms at its tallest  and 36cms at its widest .
IMG_3937IMG_3941
With the mirrors I have bejewelled in the past I have been fairly random in my placing of the jewels, but this time, because of the shape, lack of frame and the type of jewels I was much more disciplined, trying to keep things as symmetrical as I could.  I am not sure if that’s really me though!
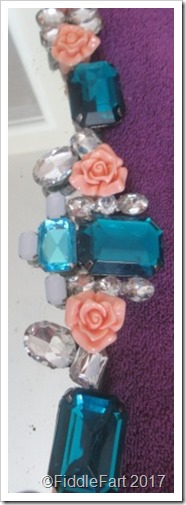
IMG_3947The roses were taken from four Poundland bracelets and the other gems taken from charity shop finds, costing no more than five pounds in total.
IMG_3940I started at the top, then the bottom, trying to “mirror” the pattern, then did the same again on the middle sections of the sides, filling the rest when I was happy,  but now looking at the finished results I wonder if it’s just a little too ordered, it seems to lack the character of my previous random mirrors.
IMG_3948IMG_3949
Although there are jewels all the way round, leaving no spaces, I have decided to put the mirror under wraps for a while, to be continued at a later date. I don’t think the edges are “encrusted” enough, but finding jewels that will fit in might take a little while, perhaps a trip to Primark might help. I think it might also need another colour or two, and perhaps a bit of layering, especially on the large turquoise gems.   It’s all a bit of trial and error, but I think I will get there in the end …… it just needs that added element of randomness.

Saturday, 5 August 2017

Wooden Angel Tags

These tags were made using mini 5.5 cm x .5 craft sticks (from e-bay)
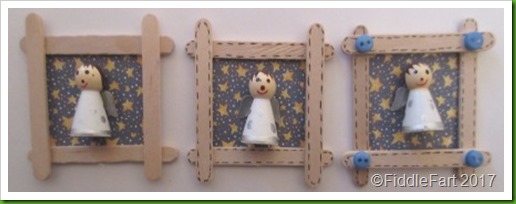
Angel Craft Stick TagsThe angels were part of a Christmas decoration, a 99p charity shop find which I bought and disassembled just for the twenty or so angels.
Angel Christmas Tree decoration_thumb[2]wooden angel decoartion peg_thumb[23]
I didn’t keep the pegs that they were attached to as they were past redemption with holes drilled into them, but I still have the tree frame, somewhere.
IMG_3713 I made up the frames with a starry background.
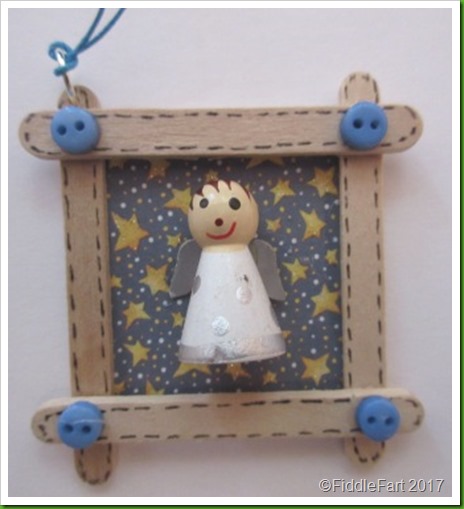
IMG_3715I used a black fine liner pen for faux stitching all the edges and then added four tiny blue buttons in the corners.
IMG_3772I drilled a small hole in the corner of the frame for a large, silver jump ring for a tying or hanging thread ………
IMG_3774……. and neatened up the back for a message, if used as a tag.
Wooden Angel Craft Stick TagNot a lot to them, but very sweet and at least I can say that a crafty charity shop was not left languishing in a drawer as so often happens, but was used!

Thursday, 3 August 2017

Home Sweet Home Card

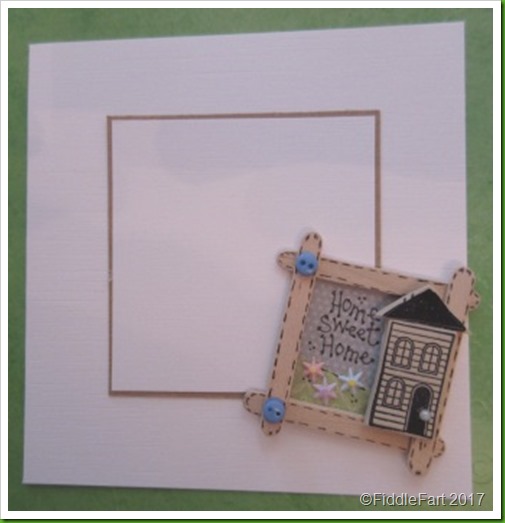
This card measure 5ins x 5ins and is made using a hand cut white linen effect card blank.
IMG_3770This idea started off as a tag, then a fridge magnet and finally a card. As a tag I didn’t think the subject worked, perhaps having a limited appeal “if” I were to put it on a craft stall nearer Christmas, as a card I thought it would be more saleable, if that makes sense?
IMG_3735For the frame I used my new mini craft sticks, which measure approx. 5.5cms x .5cms, they are beginning to grow on me despite my earlier misgivings, their size gives them really delicate look when used for tags, making them perfect for small embellishments.
IMG_3733After the background was put together and stuck on the back of the frame, I added the wording and faux stitching using a black fine liner pen, two tiny blue buttons and finally the house, fixed by two foam pads, one on top of each other onto the backing, so that they stand everso slightly proud of the frame.
IMG_3716IMG_3718
The houses were made by stamping Stampin’Up house stamps straight onto Fimo and then baked.  The roofs were then glued onto the houses with E6000 for a really firm grip.
IMG_3726Then I started fiddle farting …. as I thought the grass area  looked a bit bare, so after scratting about in my boxes I found some tiny weeny puffy flower stickers that just finished things off in that bit …… and then, I felt the need to give the door the tiniest of tiny pearl door knobs!!!
IMG_3767All that was left to do then was to stick the completed frame on to the card blank.  I mat and layered the centre using white card on Kraft card to compliment the wood of the frame.
IMG_3766Done and dusted!

Tuesday, 1 August 2017

The Twelve Frames of Christmas – Finally Done and Dusted!

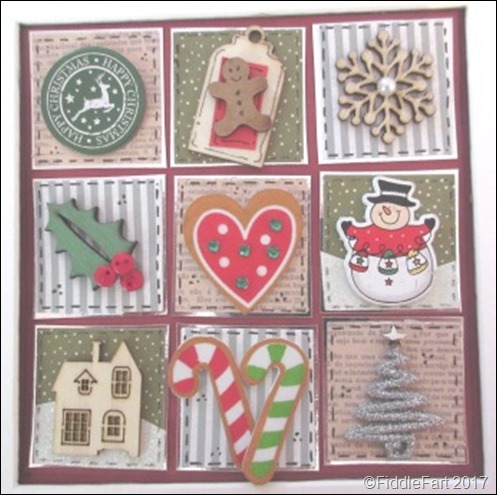
A while ago I set myself the challenge of making up 12 festive patchworks to put in the shadow box frames in my hall, usually they contain mounted insect jewellery, but I thought just for December they should take on a festive look so that every part of the flat is decorated, in as tasteful way as possible!  Kelly Hoppen would have a fit!!!!!!!
CHristmas Shadow Box FrameI got the first three done fairly quickly when the idea came to me, and then I left them, but I knew the longer I procrastinated over them, the longer they would mither me, and, if I didn’t have them finished and up on the walls for Christmas as I had planned then I would be really, really cross with myself!.
IMG_3689 So the other weekend, on my list of things to do, was to get another two patchworks sorted ……..
IMG_3691……. but after the first two, they just kept on coming ………
IMG_3692……. without me getting bored and impatient, which is what normally happens when I have to do something more than, on average, six times.
IMG_3693After I had got five done I decided that, come what may, all the rest would get done over the weekend.IMG_3694It was an excellent way of finally using up all the small embellishments I had in my Christmas box.
IMG_3695There are repeats of the same embellishments, but by using different backgrounds I don’t think many squares are exactly the same.
IMG_3696  It was quite an undertaking, but they are now done ……. phew!
IMG_3697I just need to pack them away safely for the next four months before putting them in their frames ready for 1st December………
IMG_3698……. keeping my firmly fingers crossed that bits and pieces don’t fall off in the meantime.

Monday, 31 July 2017

Craft Stick Snowman Tags

I didn’t have a clue what to do with the wooden snowman embellishments, whatever I put them on just looked naff ……. but, before finally consigning them to the charity shop bag, I tried them on a craft stick tag ….. and all of a sudden they came into their own.
IMG_3578I started by making the frames using four mini craft sticks which measure approx. 6.6cm x 1cm. 
IMG_3566I then edged the frame with faux stitching, and  added “Let it Snow” using a black fine liner pen, I applied as little pressure as I could  so that the ink didn’t bleed into the wood too much.
IMG_3568Next came the backgrounds using scraps of white glitter and blue patterned paper and adding a few extra doodled snowflakes using a white gel pen …….
IMG_3569……. these was duly glued on the back of the frame.
IMG_3571IMG_3570
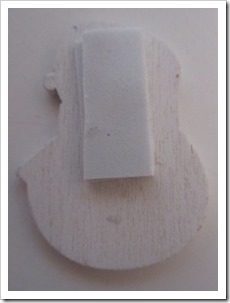
Rather than glue the snowman onto the frame, I put two sticky foam pads, one on top of another on the back of the snowman, sticking him onto the background, the foam pads giving a secure bond and bringing him level to the bottom of the frame.
IMG_3574I used two tiny blue 6mm buttons to add a little more colour  and tie the design together.
IMG_3579IMG_3580
I drilled a hole in the corner, for a jump ring to tie a length of blue and white butchers twine to either hang on a Christmas tree or attach to a parcel.
And finally, I covered the back of the tag with a scrap of white card edged with black doodles for a sentiment or message. Voila!