There is a link to the 3 x 5inc cello bags I have used in the sidebar. They cost £1.99 for 50 plus £1.00 P & P. I like to put about 50 to 60 grams of good quality sweets in each bag and this size is idea. I use dies from Nestabilities Label Set 8 for my toppers. Most of the stickers are from various Poundshops, except for the wooden reindeer ones, which are from HobbyCraft, that I have altered a little to fit the blue nose theme.
When I mess about trying to decide where to put the tiniest and most insignificant of flat back gem I call it Fiddle Farting, hence the name of the blog!!!
Sunday, 17 December 2017
A Blast From The Past A Few Ideas For Christmas Sweetie Bags From Christmas 2010
There is a link to the 3 x 5inc cello bags I have used in the sidebar. They cost £1.99 for 50 plus £1.00 P & P. I like to put about 50 to 60 grams of good quality sweets in each bag and this size is idea. I use dies from Nestabilities Label Set 8 for my toppers. Most of the stickers are from various Poundshops, except for the wooden reindeer ones, which are from HobbyCraft, that I have altered a little to fit the blue nose theme.
Saturday, 16 December 2017
Blast From The Past - Penguin Sweetie Bags From Christmas 2010
My sweetie bags are always popular but this year I have decided to drop the “poop” and use the word “drops” instead, as I think the more refined of my friends were a bit put off by the original idea .
I’ve used a die from Nestabilities Label Set 8 and my Stampin’ Up scalloped and plain punches to make the topper with Anita’s Laser Penguin Stickers (Penguin Party, 99p - £1.50 depending on the shop) to embellish.
I have put 50 grams of Cadbury white chocolate drops in the bag and would sell this for 75p.
Friday, 15 December 2017
Blast From The Past Jar of Jingle Beans From Christmas 2009
I love Poundland and Poundworld, you never know what you’ll find. It takes me ages to go round as I have to really look at the stuff they have and then think “What could I do with that?”
I got these jars yesterday, would you believe a pack of 3 for a pound?
I have used my Stampin Up scallop and plain circle punches for the top, front, back and tag and added a snowflake punchie to the top with a clear gem. Around the lid of the jar I have put self adhesive ribbon, slipping the thread from the tag under it to keep it secure.
The jar is filled with red, green and white jelly beans. You can get these beans in many different colours, so you can mix and match them to go with your them. Blue and white ones would look brilliant too!
Other ideas could include, bonbons for snowballs, chocolate nibs for reindeer poop, aniseed balls for Rudolph noses, jelly lips for Christmas kisses and jelly hearts for Christmas love …… (hearts and lips are available from W H Smith and Thorntons Pic n Mix)
A side affect of crafting is also looking very carefully at sweets to see what they could be used for …… and then of course you have to sample the goods ……!
Thursday, 14 December 2017
Blast From The Past - Sizzix Christmas Favour Box From Christmas 2013
I have been wracking my brains trying to think of a festive idea to use as a gift idea for all the bags of starlight mints I bought back from Las Vegas …..that filled my suitcase to bursting point!
And then I remembered my Sizzix Bigz XL Shaker Box Die (Item # 655134), that hasn’t seen the light of day for at least two years!!! OMG, it was perfect!


…… but it had to be flat, so I decided to punch some red scallop edged hearts and then add a Christmas message using a white gel pen, sorted!
I used Marc’s band idea from his Christmas cards to make one for the boxes to stop them flapping open, using a strip of contrasting red card …… and creasing it using my box maker board.
I then made the sentiment decoration using my Stampin’ Up scalloped punch, scraps of card and gold, white and silver Christmas circles from Craftwork Cards http://www.craftworkcards.co.uk/products/1585/in-circles-christmas-gold-silver.html
I used it to cut the red striped card from Payper Box I got a few weeks ago which just spelt Christmas to me! Not wishing to waste any scraps, I stuck the piece that came from the window in the bottom of the box as a background to the sweets.
Wednesday, 13 December 2017
Blast From The Past - Rudolph Chocolate Bar From Christmas 2010
Nothing much to this …. just a way of making an inexpensive bar of chocolate look extra special and festive. I’ve just added googly eyes, antlers and a red nose, which I’ve stuck on with a sticky foam pad to make it stick out more.
You could add a loop of ribbon on the back to hang it on the Christmas Tree.
Tuesday, 12 December 2017
My Festive Guest Room 2018
I think you could say that this is suitably over the top ….. but when Iris and Bertie come to stay over the holiday I want to make some lovely memories for them, even if they are of a daft old nanny who always wore a Christmas top and had Christmas bedrooms!
I found the duvet set first and then followed the stag/reindeer and Christmas tree theme through, adding a little silver here and there. The large, silver, star candle holders were a charity shop find for just £1.49 each, but I think they will stay up all year. And yes, I have changed the bedside lamps just for the month of December, what am I like?
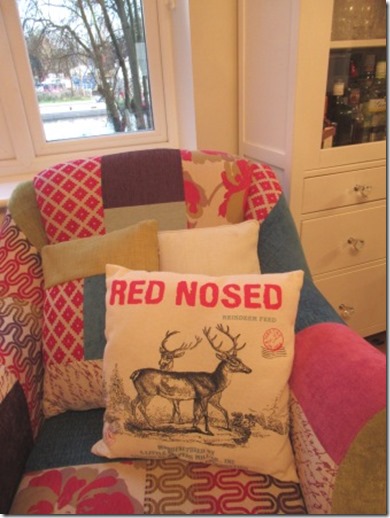
The stag cushion was another poundshop find, I just had to have it, as it was just perfect to finish off the bed.
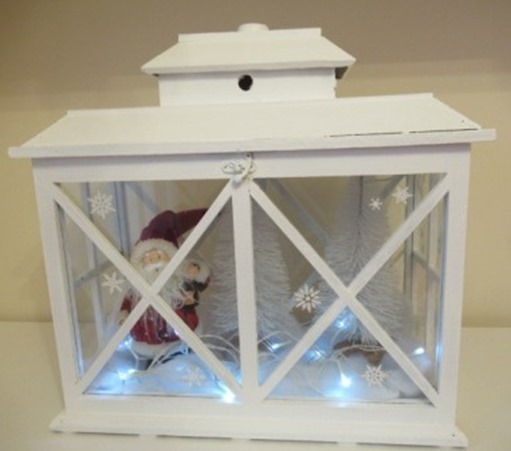
I’ve dressed my terrarium up again with a lit Santa scene, as there’s nothing like a bit of awe and wonder with noses pressed right up against it!
My bedroom is pretty much the same as it was last year, a low key festive look, all duvet a few fairy lights and red snowflakes……. however I have decided to treat myself to fitted drawers and shelving units either side of my bed in January, slightly more “decorative” than in the guestroom …… so who knows how it might look next Christmas!!!
Monday, 11 December 2017
My Festive Shelves 2018
I spend far too much time for my own good drooling over the Christmas shelf displays on Pinterest ………..
I think I am slowly getting there, but it’s a lot harder to put a whimsical shelf together than I imagined.
I would dearly love to go totally and truly vintage, but that’s never going to happen, so building on from last year I have added a few more bits and pieces, mostly new but adding a few charity shop finds here and there when I find found them as these tend to be a little more quirky.
I have gathered enough stuff for the three shelves that are spread over three of the walls in my lounge sitting area. I think it will always be a work in progress, new things will be added and others replaced I am sure, and then perhaps in twenty odd years time it could be called vintage!!!
The shelf unit in the kitchen area (over the sink) of the through lounge has also undergone a festive transformation (another work in progress). Last year I just put cards in the spaces but this year I decided to make it a little more Christmassy and over the top ……… and in the evening, yes I do turn the main lights off and light a tea-light in each of the lamps, which makes me feel all festively fuzzy, especially with a cherry brandy in my hand!
Finally, not a shelf ……. but I found this cushion in Poundland Worcester (£1) ……. I now wish I had bought a couple more, ain’t that always the way, as I love it so much, and knowing pound shops and their stock, I very much doubt I will ever see them again …… but never say never!!!! I may unpick one of the seams on this one (after Christmas now) to add a little more plumpness to it, but it just looks perfect on my armchair. Yes, it’s beginning to look a lot like Christmas!
Sunday, 10 December 2017
Blast From The Past - Mini Christmas Button Wreath From Christmas 2011
This was a bit of an experiment that has turned out pretty well.
I’ve used a bracelet (part of a set of six for £1 bought from a funny discount shop in Wolverhampton) and buttons that I have found at various car boot sales.
I attached the wire hanger before I started gluing on the buttons. I only intended putting one layer of buttons on, but as I delved in my various boxes I found I have various other sizes that fit perfectly over the original ones and it progressed from there. Dead chuffed!
Saturday, 9 December 2017
Blast From The Past - Snowman Chocolate Bar From Christmas 2009
From this to this ………

This must truly rank as the most unnecessary embellishment of a item of all time!!!
As my sister would say, “You have far too much time on your hands!”
This is a bar of chocolate that I have wrapped round with white glitter felt (but ordinary or textured white paper would be just as good), using double sided tape to keep it in place.
The hat is ….. a finger from a child’s magic glove (the ones that look tiny but stretch as soon as you put them on). I have cut off one finger and rolled it a little around the bottom and plonked it on the snowman’s head. (I got the gloves from a Pound Shop – and one pair of gloves gives you 10 hats).
The scarf is just an oddment of ribbon, the eyes and buttons are black Paperchase acrylic gems and the nose is a filmo embellishment I bought a while ago but I just can’t remember where, but orange card would be just as good.
Daft idea I know, but cute!
Friday, 8 December 2017
Blast From The Past - Mini Christmas Printers Tray Decoration From Christmas 2011
This is just pure Fiddle Fart Fiddlefartness just for the festive sake of it ….
The tray was a container for little wooden shapes and it seemed a shame to throw it away …. so I had a very happy and indulgent time filling each square with all the little Christmassy leftover bits I’ve had lingering from Christmases past..
And I made such a mess … looking for things that would fit, as you can see.
…. As to what I am going to do with this piece of frivolity …. I don’t have a clue!
Thursday, 7 December 2017
Blast From The Past - Jingle Bells From Christmas 2009
A few people have said that they have looked at my blog for Christmassy ideas. This has got me racking my brains for all the little things I have made over the years. I've put a few together now and will share them over the next few days.
The reason I try to keep coming up with little “fiddle farty” things is that I don’t usually send Christmas cards to work friends as they have probably already bought them from the box I leave in the staffroom.
But, I do like to give them something that I have made, that they can keep for more than just one Christmas, unlike a card that is soon forgotten.
Often these trinkets cost less than a good card, like this jingle bell I made last year. The bells were from Poundland, I think I got 20 in a tube (for £1 !!!!), all I had to add was a length of burgundy ribbon, for a loop and a bow, and a punched tag on which I wrote, “….jingle all the way”, and then attached to the top of the bell.
I made small boxes, using brown Kraft card, which I love to use, and my box maker (the first few were a bit trial end error, but when I got the size just right, I made a template to use over and over again). The final touch was tying the box up with soft parcel string. I am useless at costing, but I bet this cost me less than 50p to make.
Wednesday, 6 December 2017
Blast From The Past Elizabeth Shaw Mint Robin From Christmas 2011
Oh my life, what possessed me? This is definitely too much fiddle fart for just one Elizabeth Shaw mint crisp!!!!!!
I thought that I had flogged the whole chocolate mint thing to death, but then I got to thinking about robins after finding this robin embellishment below that I bought last year and as I had a few mints leftover from something else, one thing led to another!
Using the robin as a sort of template, I used my 1 3/4” Stampin’Up circle punch for the bodies, made with brown card and the breasts with red glitter paper (which I then re shaped), then I cut a section from circles made with my 1” punch for the tails, (also in brown card).
But my main problem was that my feeble brain just couldn’t, after making the first side of the robin, fathom out how to put together the reverse one (? what a numpty) …. and I am ashamed to say I had to have several attempts at getting both sides to match up, the poor robin’s tail ended up in some very strange places before I was happy!
Eventually I managed to match both sides up, including googly eyes and then thought about adding a pair of dangly legs, using brown thonging and two beads. I have to admit it looked very cute!
The final stage was to add a thread to hang him up by and sandwich a mint between the two sides, but as I said when I first started …. far too much fiddle fart for one blooming mint!!!
Subscribe to:
Posts (Atom)