Monday, 8 October 2018

A Tale Of Two Cards

My sister-in-law asked if I would make her a wedding card using the flower design that I’d used on the vellum sheet at the front of the invitation pack I’d made for her son’s wedding.To be honest, I’d lost my love for the design as soon I’d put the invitations to bed, so admit to keep putting the job off until it was almost the very last minute.
Initially I thought I might be able do a very simple decoupage with it, but the design was too delicate with airy fairy petals, leaves and stems overlapping with nothing real to grasp hold of and the lines for my usual version of decoupage need to be definite, as well as basic.
IMG_8742
In the end I simply took the picture and mat and layered it on white and silver mirror card on a hand cut white linen effect card and then painted over it with a Crystal Clear Spectrum Noir Sparkle Pen for an extremely subtle glitter effect, so subtle that I couldn’t pick it out to photograph..  Any tiny, flat backed gem or pearl I tried just stuck out like a sore thumb. I don’t really feel that this was my finest crafty hour.
picture frame card
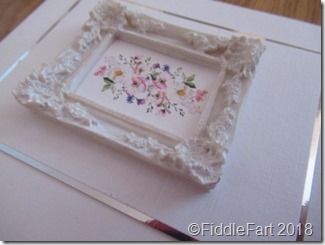
After sleeping on it, I decided to think outside the box and be a little quirky, miniaturising the flower design and then putting it in a small resin frame. 
IMG_8725miniature picture frame card
This second design is much more me, but in the end it was the first card that made the final cut as far as my sister-in-law was concerned.  However it’s an idea I like, so intend to experiment some more for a couple of Christmas cards I already have in mind.

Wednesday, 3 October 2018

Hobbycraft Advent House

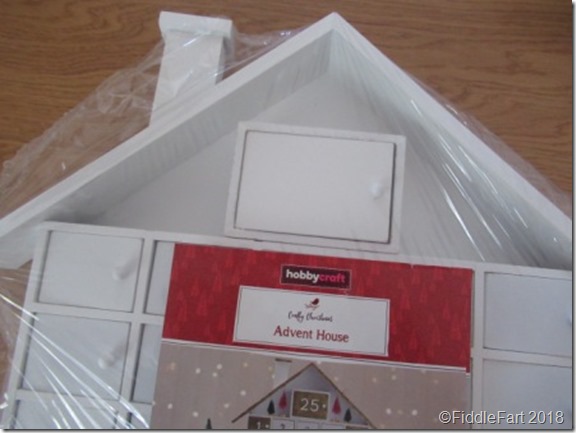
I went a bit mad and purchased a Hobbycraft Advent House

https://www.hobbycHobbycraft Advent HOuse.raft.co.uk/wooden-pre_primed-advent-house/637476-1000
It cost me £15, so not a cheap project and to be honest I am not sure if I will even actually make a start on it this year, but you never know.
Hobbycraft Advent House
I particularly like the top section where you can make up little 3D scene. I have a couple of resin snowmen and some bog bottle brush trees that I think could look quite good there. 
Hobbycraft Advent HOuse..
I am not sure how to approach the doors of each compartment as they don’t come off, which means working with the house as a whole for a lot of the time.  The knobs don’t come off either, so I am a bit loathe to colour them just in case I slip with my Sharpie. 
However at the moment I am thinking that I will make a small 1.5ins x 1.25ins scene on a piece of card for each door which I will then glue on and then over lap the edges nearest the knob with an advent number or other embellishments like a star or snowflake to draw it all together, well, that’s the theory anyway, if I ever do get started!
637479_1000_1_340
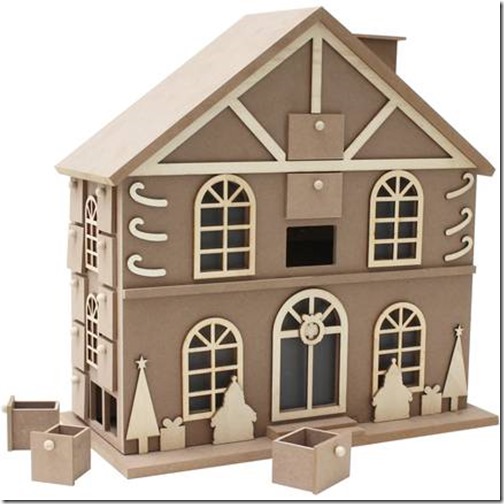
I also love Hobbycrafts LED gingerbread house, but at £25 it would be a very extravagant purchase, however I have promised myself to keep a daily eye on it once December comes just in case it gets reduced.   Although the drawers come out I think decorating the attached tree/santa panels could be a little tricky.  To be honest I would prefer to work on a completely blank canvas, but hey ho that’s me!

Tuesday, 2 October 2018

An Object Of Desire – The One That Got Away

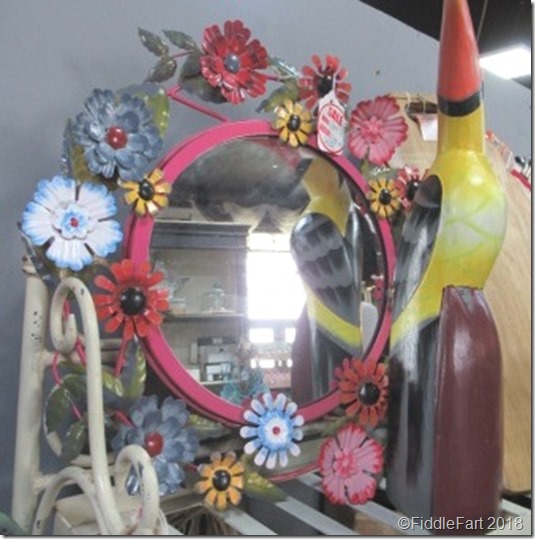
I admit, I have “a thing” about mirrors and I have really tried to train myself not to look at them any more as I just do not have a single space in my flat to fit even the tiniest one in.
IMG_8594
So imagine how I felt when I spotted this beauty, even Lu said “That looks like a you mum!” – it was love at first sight, but I daren’t even move it to get a closer look, because if I’d have made a physical connection I know I would have been a gonna!  My mind was racing through all the rooms in my flat hoping against hope for an Ulrika moment when I would suddenly realise I actually did have the perfect place for it,  …… alas, it was not to be …………… humoungous sigh!
……. And then, when I got home I had to ignore a niggling thought …… wondering if I could have removed the mirror whether it might have made an eccentric sort of wreath for my front door!?!?!


Monday, 1 October 2018

Halloween Favour Pots.

Halloween Frankenstein Favours pots
Following on from last weeks shopping, I have to admit in some disappointment with the pumpkin pots, the opening at the top proved to be much smaller than similar pots I have used in the past and as a result I can’t really fit the chocolates I intended inside with any great ease and in turn that would be fiddly for any child who received one. 
IMG_8940IMG_8938
The hole was also too small to put in a battery operated tea light, so another crafty bum! So ……. back to the drawing board ……and after a mooch round Home Bargains I found some chocolate foil wrapped pumpkin balls to put in them.
IMG_8917_thumb[3]
The tops of the Frankenstein pots are bigger and I was able to put in a satisfying amount of Celebration sweets plus a few Halloween chocolate coins.
IMG_8945IMG_8942
Once filled I put the pots in a cellophane bag, tying the top with a ribbon and adding a bat and tag.  The bats cost £1 for a net of 12 from Poundstretcher.
bats and door wreathIMG_8939
I was originally going to put an eyelet through the hole I punched in the bat wings but thought it would be much safer not to add any small elements that could come adrift.  There were no small parts to come loose on the pots either, you have to be so careful!
Halloween pumpkin pot favours
I didn’t put “Trick or Treat” on any of the tags because the  event the pots were made for was a few days after Halloween, but since the evening included a pumpkin trail through the nursery meadow I thought some of the elements of Halloween would be still fresh in the little ones minds.
Halloween Frankenstein favour potIMG_8951Halloween pumpkin pot favour
The Halloween stickers came from Aldi last year, but as they always seem to have really useful stickers for Halloween and Christmas I will be on the look out for them again this year.
And the ribbons? Well, can you believe I am still using the ribbons left over from making the bouquets, table flowers, button holes etc. for Tom and Laura’s wedding, who would have thought that five years later the ribbons would be used again in part to raise money for their babies wonderful nursery school!

Wednesday, 26 September 2018

Considered Purchases For Halloween And Christmas

I thought I might not see these Halloween pots this year, they’ve been around for years but like the nets of boney hands and skeleton garlands of yesteryear I wondered if there would come a time when they would disappear too, BUT after visits to  the Poundstretcher stores  in Worcester and Evesham I found them! They also do a skull pack, which I may also get.
IMG_8917
I wanted them in particular this year because Bertie’s nursery has an Autumn Fayre where they organise a trail of pumpkins in the school meadow, it is both a magical and entrancing evening especially for the little ones (hopefully pictures to follow as and when it happens),  but funds are tight and I thought I could decorate and fill a few pots with sweets to help raise a bit more money. Pictures below are from my 2012 efforts …… I think I can do better now!
Poundworld Halloween Pumpkins_thumb[7]Poundworld Halloween._thumb[8]
Christmas Photoframe Sampler_thumb[6]
I also visited Poundland to get some more photo frames for my Christmas Sampler Frames, the design has now changed from the ones they had before, …….. typical ……..
 IMG_8918
….. but I think I can achieve the same sort of result/affect with the frame turned vertically.  I also think I can use the patterned background sheet as a template and or base on which to stick my festive background papers making it a much less fiddly effort than my original one.  I prefer the old frame with its circles but  as soon as I have had a play I will post the results. The frame comes in black or white ……. I am thinking a black one could also be used for a Halloween themed decoartion with appropriate embellishments if I can find some.

Tuesday, 25 September 2018

Finished Sharpie Chandelier

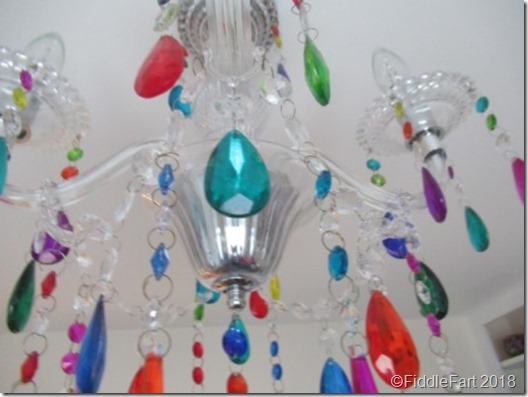
Following on from last week I have finished my Sharpie pen chandelier! I am so unbelievably chuffed you wouldn’t believe. I don’t think the pictures really do it justice but all the lovely positive comments  from my various visitors have helped reassure me that I haven’t just gone and ruined a perfectly good light fitting, even young master Bertie was totally entranced when he saw it, he thinks Nanny lives in Elsa’s castle!
sharpie chandalier.
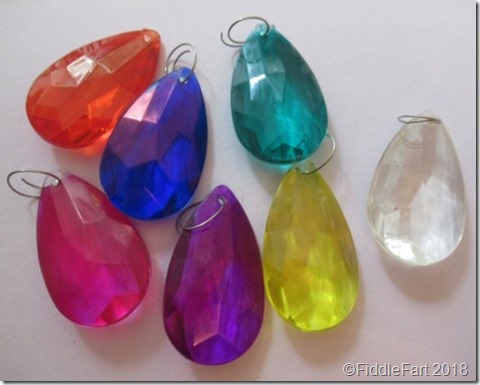
As I said last week I have made sure I have kept all the drops I took off and replaced for those I coloured, just in case I ever go off it, so putting the light back to it’s original state would not be a problem.
sharpie pen chandalier..
I also raided my twig Christmas tree decoration box to add the now coloured pointed glass drops to the chain links plus the small square beads to make the drops on the candle holders and top fitting a little longer.  The final thrill was finding that I had a glass ball centrepiece to put the finishing touch to the bottom.  The chandelier now consists of both acrylic and vintage glass drops.  My only slight concern is whether the colours will fade over time, however it’s nothing to pull the blind down  on bright day and wait and see.
sharpie pen chandalier
I am going to live with the light now for a month or so and then may possibly consider getting some coloured chain links ….. we shall see. At the moment I have a dark Next purple, green and teal paisley design duvet set on the bed , but I also have a very bright BHS patchwork set that I am pretty sure will help give over the top bohemian look I am experimenting with a more vibrant appeal.
garland
I have left the box of drops out because I think I will make the chandelier in my own bedroom a little fuller too, but  will definitely be leaving it clear. This also means that my twig Christmas tree will almost certainly be getting a whole new look this year, so I may also need to invest in a new pack of Sharpie pens.

EXTRA POSTS
I am going to add extra posts here and there as it's my favourite time of the crafty year with Halloween and Christmas fast approaching! I thought I would give you quick heads up to some of the things I have spotted and making considered purchases of.

Monday, 24 September 2018

Rose Heart To Give To A Bride On Her Wedding Day

Again, following on from last weeks post, I knew that Bertie and Iris would want to have their own hearts to give Amanda on her wedding. Ideally for the sake of peace they would have been identical, but really they had to be different and then we could stand back and see which heart the little darlings would choose to give (I just hope it isn’t the same one!)
Rose heart garland wedding day gift for bride
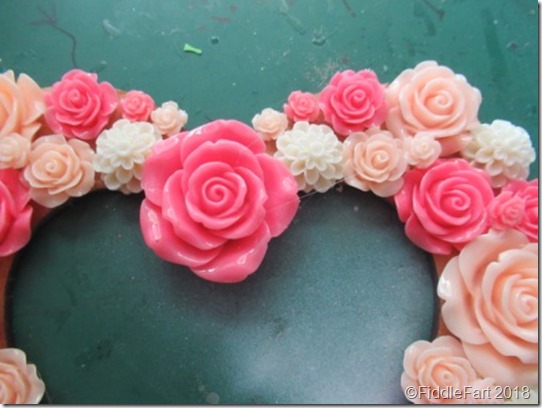
Using the same MDF heart base as per the last two I used E6000 to glue rose and cream glitter resin/plastic flower embellishments from The Works.
MDF Heartroses.IMG_8734+
When all was stuck down it became blatantly apparent to me that the garish pink roses in particular would not be at all to the brides taste ……… aghhhhhhhhh …….
IMG_8697
Then I remembered a can on cream spray paint I have had squirrelled away for a million years, dare I even think of spraying what had taken me at least an hour or so to put together, believe me there was much wringing of hands …….
IMG_8698
……. before I dared and with the first tentative spray I knew that there was no turning back, however the effect turned out to be pretty pleasing as with each layer of paint the vivid pink became more and more muted, until I told myself to stop, before the subtle effect was lost under too many layers, less is more!
IMG_8700
From there the best thing to do was to let it dry out properly overnight and see if my reaction was still as favourable in the morning. 
IMG_8738
Fortunately it was, and after a little more thought I decided not to over egg the pudding, all the heart needed was a tiny pearl in the centre of the resin flowers and larger roses and then add a ribbon for the bride to hold.  The only thing I wish I could have tried was a little perfect pearls rubbed over the petals, but sadly the collection I used to have didn’t make it in the crafty cull I had to have when I moved because I didn’t really use them that much, sod’s law!!!
IMG_8740
The ends of the ribbon were hidden on the back using a piece of contrasting paper which  I faux stitched round the edges of with a black fine liner pen to finish the whole project off.
This wasn’t a cheap project, using £6 worth of embellishments, but I think it is pretty unique and a change from the usual good luck horseshoe. 

Tuesday, 18 September 2018

Sharpie Chandelier – A Work In Progress

As you know I have “a big thing” about chandeliers, especially, at the moment, coloured ones.
chandalierChandeliers-Oct2014-19
My flat is pretty much finished, but it doesn’t stop me from pondering upon and fiddling about with the “fripperies” which really put my stamp on the place, love them or loathe them.
IMG_8862
And as such I have always wanted to give my spare/guest room a colourful bohemian/gyspy feel to it, but at the moment it remains, in my eyes, very conservative, so I have been looking towards the el cheapo (mostly acrylic) chandelier that’s in there as a stepping stone to becoming more flamboyant, wondering if I could adapt it to look like the coloured ones I have been lusting after.
I have looked on various websites to see if I could buy coloured drops, but I would have been limited to just a few colours as they generally come in sets of 5 or 10 and to be honest at the price they were I could have simply bought a new colourer chandelier for around £50. I even pondered buying two really cheap coloured shades for around £12 each to dismantle, but again that would limit me to one or two colours and could prove to be an expensive fiddle fart if the idea in my head didn’t actually materialise.
IMG_8861
Then last week completely unconnected so I thought, I found this light shade in a local charity shop for just £1.50, well it would have been rude not to buy it especially at that price, thinking I would take it apart to make some Christmas tree decorations, I definitely wasn’t thinking bedroom chandelier at the time.
IMG_8866
But then, I had an Ulrika moment just as I was nodding off to sleep …… I wondered if I could colour the drops with Sharpie pens, well, I may now have a very discoloured thumb and index finger, but it worked!
IMG_8868
There was only one thing to do then and that was to see how the first four looked on the existing chandelier ……. OMG, I was so thrilled I can’t tell you.
IMG_8874
The drops turned out to be exactly the same size/shape etc. as the originals but I have carefully replaced and put them in a safe place just in case I ever want to put them back in the future.
Sharpie Chandalier
This is as far as I have got so far, I think it could still take a bit more colour, but I need to get into my Christmas decoration box where I know I have some of the smaller link bead chains and, am pretty sure, another large, round centre ball to finish it off.
IMG_8877
On the £1.50 shade, in total, there are at least 100 drops, they are a bit of a fiddle to remove, but I reckon I could add a few more drops evenly on the linking chains…….. post will be continued when this has been done.
Crystal Christmas Tree using Chandalier Drops_thumb[3]
Then, I plan to colour and use some of the remainder  on my twig Christmas tree. For the past two years it has been all very twee and tasteful and I am sure I would get that “same old same old” sort of feeling when I come to decorate it, so this year I hope to bring out it’s inner gyspy as well ……….

Monday, 17 September 2018

Bride’s Wedding Day Heart

Following on from last weeks jewelled heart that I couldn’t let go of, this is the one of the replacements I made for either Iris or Bertie to give to bride.
Wedding Day Heart for Bride
The base is an MDF heart which I covered with layered, punched daisy flowers and leaves.
MDF HeartBrides wedding Day Heart gift
Putting together the four layers (three large and one small daisy punch) to make each fiddly flower made my gums itch by the end, I am not good with repetitive tasks!
Brides Wedding Day HeartIMG_8731
A flat backed gem or tiny pearl rose was then added to the middle of each flower with the odd punched leaf interspersed between them. When thoroughly dry this was followed by a bit of fluffing up to separate the petals and add some extra texture.
Wedding Day Heart Gift
The ends of the ribbon were hidden on the back using a piece of contrasting paper which I faux stitched round the edges of with a black fine liner pen to finish the whole project off.
It was a fiddly job, but someone had to do it. It does look incredibly pretty, and if the ribbon was removed the heart could then be framed in a shadow box as a lasting memory of the wedding.