Sunday, 11 June 2017

Craft Stick Christmas Snowflake Decoration

This idea is/was a bit of an experiment, it isn’t quite right, it needs a little fine tuning but I think other similar ideas will spin from it.
 Craft stick snowflakeCraft stick snowflake 2
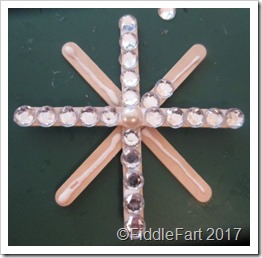
I used eight lolly/craft sticks to form the snowflake shape, gluing them together with E600 glue so that there was no risk of them coming apart.
 popsicle stick tree decorationpopsickle stick tree jewelled tree decoration
I used PVA glue to stick a large flat back pearl in the centre and the largish clear gems on the rest of the sticks.
popsickle stick jewelled tree decoration 1Craft stick snowflake 2
Then I got carried away and added smaller iridescent pearls from a strip of stickers on top of the clear gems, I have to say that the pictures don’t do justice to the sparkly effect.
craft stick snowflake 1
On the back I stuck a silver pendent bail to act as a hanger for a thread. IMG_2370IMG_2371
I then decided to colour the back with a silver marker, so it looked more “finished off”.
I want to try this idea again, but using smaller mini craft sticks I bought recently and then decorate them identically on both sides.  I think making a smaller size would fit better between the branches of a Christmas tree and being double sided it would look better from all angles and if the decoration twirled round.

Friday, 9 June 2017

My Ever Growing Genie Bottle Collection

I have finally filled the shelf above the TV with 60's/70's Italian Genie Bottles and I just love how it looks.
Genie Bottle CollectionBut what do I do now if I see anymore, at silly prices?   I have a few bottles in my guest room, where they look equally lovely (not everyone's taste I know).  Should I carry the theme round on the other two walls, on the existing shelves, over the sofa, or would that be overkill?  .......... Answering my own question after a month or so of living with them .......  it would definitely be overkill!

Wednesday, 7 June 2017

Spider Halloween Altered Domino Decoration

This is my second project using the “proper” dominoes I found in a charity shop and just like the first time, stamping directly on the blank side is not as easy as it sounds, as I found that the stamp slid and subsequently smudged.  If I want to use a stamped design on a domino again, I will stamp on paper first and then glue the design onto the domino.
Halloween altered domino 9Halloween spider altered domino pendant
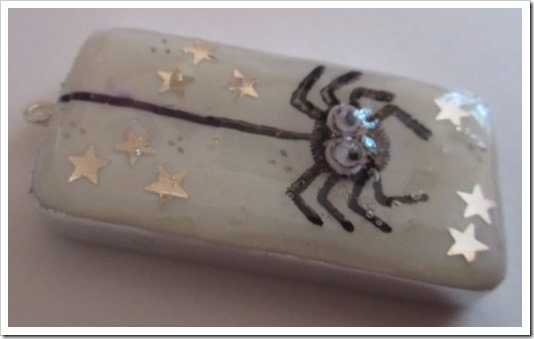
I used Jet Black StazOn ink for the stamping. I’m afraid I can’t remember the make the stamp.
Spider Domino TagSpider Halloween Domino
When the ink was dry I added a few tiny silver stars and clusters of three dots here and there and then applied a good layer of Ranger Glossy Accents on top, leaving it to set for 24hrs before adding two googly eyes.
Halloween spider domino I covered the sides of the domino with narrow, self adhesive silver metal foil tape and then drilled a hole in the top for an eye screw pin to hang the domino from.
halloween spider domino wwLooking at the pictures It does look a tiny bit bland especially for Halloween, I will hang the domino from a white thread, and then when the ribbons I have on order arrive, I think I will add an orange or purple one to bring the whole design together (extra pictures to follow).

Monday, 5 June 2017

Chocolate Bugs Halloween Trick Or Treat Jar

I found some chocolate “bug” chocolates in Aldi a while back and wondered if I could do anything with them for Halloween.
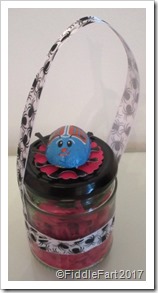
Halloween Jar 7I had already saved a small jar with a black lid thinking it might come in useful for such a project.
Halloween JatI started by covering up any writing on the lid with a permanent black pen and a red scalloped circle.
Halloween Jar 1Halloween Jar 5
I then glued some spider ribbon (from my Las Vegas trip to Michaels), round the middle of the jar and half way down the sides to make a handle, it took a couple of goes to get it right, hence the miss match of pictures.
Halloween Jar 6Halloween Jar 3Halloween Jar 7
I filled the jar with shredded red tissue paper and added the bugs, plus one sitting on the top.
Halloween Jar 4Halloween Jar r
I then decided that it needed a little something else, so made a label to stick round the middle using a scrap of torn black card with a handwritten Trick or Treat message using a white gel pen.
IMG_2448It’s an idea I am quite pleased with ……. but it could certainly be improved/fine tuned a little.Halloween Jar eI don’t actually think the jar needs to be filled with bugs, one sitting on a bed of shredded tissue would be just as effective, with perhaps plastic Halloween novelty on the lid like a bony hand or skull perhaps……….
Halloween Jar qHalloween Jar w
…… so I think I may be collecting a few more small jars before Halloween finally arrives..

Saturday, 3 June 2017

Craft Stick Flower Fairy Decoration.

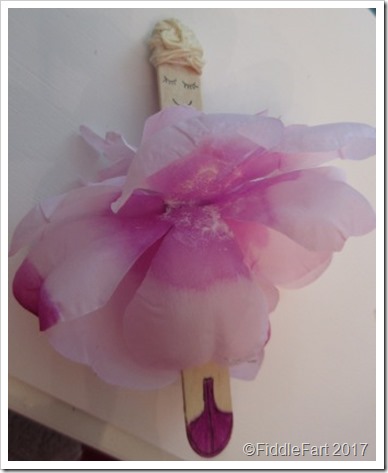
Another craft stick fairy today, this time I wanted to try using flower petals from cheap artificial flowers for the skirt.
Craft popsicle flower fairyI call this the Queen Mother of my craft fairy projects, because she is about double the size of all the rest!  I thought all craft sticks were roughly the same size, but when I got the “Queen Mother” sticks home, I soon discovered they’re not.
Flower Fairypoundland flower
The cottage rose came from Poundland, it was a very generous size, so I reckon there are enough layers for at least four more fairies. 
I started by wrapping a natural coloured cotton yarn around the top of the craft stick to make the hair.
Flower Fairy 5This was followed by giving the fairy a face, using a fine liner pen and a top from a scrap of matching pale purple card. I then took three petal layers making a small slit in each for the stick to pass through.
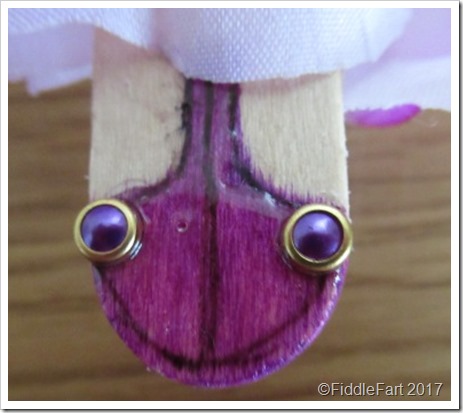
flower Fairy 8To help the layers lie a little flatter I first used PVA glue between the layers, at the top, but then swapped it for blobs of glue gun glue as it stuck much faster.  I also added the fairy slippers by using a purple Sharpie pen and the carefully went round the edges to accentuate them, followed by a layer of Ranger Glossy Accents.
Flower Fairy 3The fairy’s arms were made using two natural coloured beads knotted on to a length of cotton yarn.
flower fairy 88I couldn’t believe it when I found that the Home Bargains butterflies I had were a perfect match for the petals. I stuck the centre of the arm thread on the back of the fairy and then glued the butterfly over so that the thread was hidden.
craft stick flower fairyNext followed all the twiddly bits using strips of iridescent self adhesive gems on the wings, and the fairy’s top, plus two purple nail art gems on her slippers and a purple flat back flower in her hair.
IMG_2360To decorate a Christmas tree I think I prefer the fairies made using the smaller craft sticks, but ……….. I am also thinking that you could make some lovely fabric or paper bunting for a little girls bedroom by sticking matching fairies on alternate triangle pendants with a few stars  …….. perhaps this is “a watch this space” post for the future ……. when I have a little more time.
craft stick fairy from behindThis fairy however is destined to mark Iris’s first dancing class sometime in September, I need to scout the charity shops for an ornatish style, white frame to stick her on, after removing the glass ……. again, watch this space.

Thursday, 1 June 2017

Christmas Tree Card

This card measures 5ins x 5ins and is made using a white linen effect, hand cut card base.
Christmas Tree CardThere’s not an awful lot to this card. I have mat and layered on red and silver card for the centre panel with a little faux stitching using a black fine liner pen around the red mat.
The Christmas tree triangles came from a pack of Riverbank Revels mini bunting, reduced to 50p from The Works.  Some have straight edges and some have scalloped ones.
riverbank revels buntingI put two wavy layers of white glitter card across the centre square, and then arranged the triangles into a group on top.  The final touches were added by putting a small silver star above each tree and clusters of three dots here and there.
If I were to repeat this card, I think I might group the trees just a fraction higher, as I think there is a little too much white space in the sky area.

Tuesday, 30 May 2017

Soldering With Marc – For Microscope Slide Christmas Decorations.

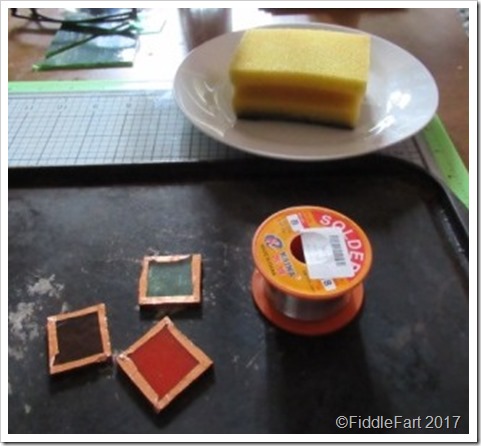
While I was in London the other week with Marc we watched quite a few microscope soldering tutorials on YouTube before having a go ourselves. Crafting with microscope slides has been a thing with me for too many years now,  I really think I should let go!IMG_2143The first thing we did was edge our experimental glass pieces with copper foil, which the solder should adhere to, after it has been coated with flux.
s-l400s-l225
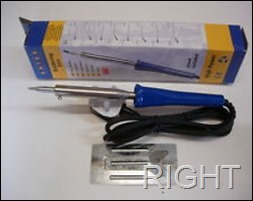
All was going well, but then we got unstuck as Marc’s soldering iron was, we think, more for proper electrical work, it had a weird end which was difficult to work out, at first, where to apply the solder, in the end we worked it out, but it was frustrating and fiddly, what we really needed was a pointed ended soldering iron.
The solder that came with it was also very thin, more suited to fine electrical work, but we persevered.
IMG_2145IMG_2146
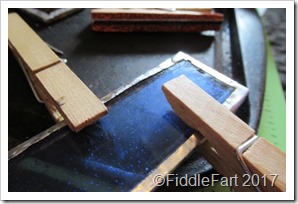
As this was pure experiment we used pegs to secure/hold the glass, but should I wish to pursue the idea I think I would need to get a Helping Hand magnifying glass stand as well.
s-l400 (1)And the results? Well, I am not sure …….. I was expecting a rougher, thicker and lumpier, handmade sort of looking end result …….
IMG_2148IMG_2150
….. and though my application of copper wasn’t exactly perfect, we/I think the solder was definitely too thin.  However, for once, I didn’t get all that impatient and preserved just to get a feel for it all, in fact I quite enjoyed it, I didn’t get the usual itchy gum feeling when I get frustrated. 
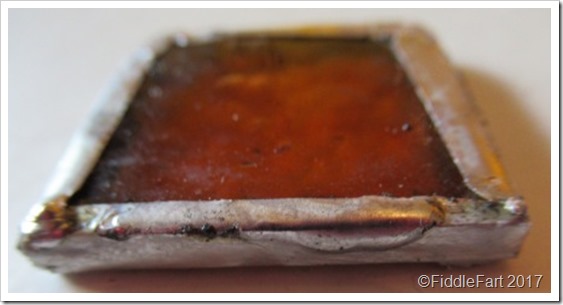
IMG_2152I have had a look on e-bay and if I wanted to I  could invest in a soldering kit for under £10, I would then need to buy solder and flux (not sure how much) and a stand (£5).  However, to be honest, if applied with care, using the silver foil I bought a month or so ago, with hindsight, would/has produced just as good an effect as the slides I have studied on Pinterest, plus I can easily change the colour of the foil using a Sharpie pen …… so I need to think carefully if, after all this playing, it’s really worth it.

Sunday, 28 May 2017

Charity Shop Find – Santa’s Tea-light House

I am always on the look out for kitsch Christmas ornaments with which to grace my festive shelves and this, though I doubt if there is any age to it ticked a few of my boxes, especially for just 50p.
santa house tealight holdersanta house 1
I just love anything that I can put a tea-light in at Christmas, so there’s one box ticked already ……. but it was the snow I had my eye on ……..
IMG_2559santa tealight holder 4
I knew with a liberal dowsing of translucent micro fine glitter it could be ….. erm….. transformed, so that’s exactly what I did, also giving Santa a light dusting too.
Santa Tealight House DecorationI also felt that the wreaths could also do with a little something too, so a few flat backed gems here and there won’t go amiss ……. not to everyone’s taste I know, but very me ……  when grouped together with other similar festive pieces I might just get away with it!