Monday, 10 September 2018

Jewelled Wedding Heart

Oh dear ……. this jewelled heart was meant for either Bertie or Iris to give to my nephew’s bride Amanda at their coming wedding ………..
Jewelled Wedding Heart - old brooches
……. only I decided that I couldn’t bear to give it away and want to keep it for myself!  What am I like? I can just see it now in a shadow box frame on one of my shelves!
IMG_8703IMG_8704
I knew as soon as it was almost finished that I couldn’t be parted with it, so with time ticking I now have to come up with another couple ideas for the said bride so that she won’t be found empty handed after the ceremony!
IMG_8707jewelled Heart.
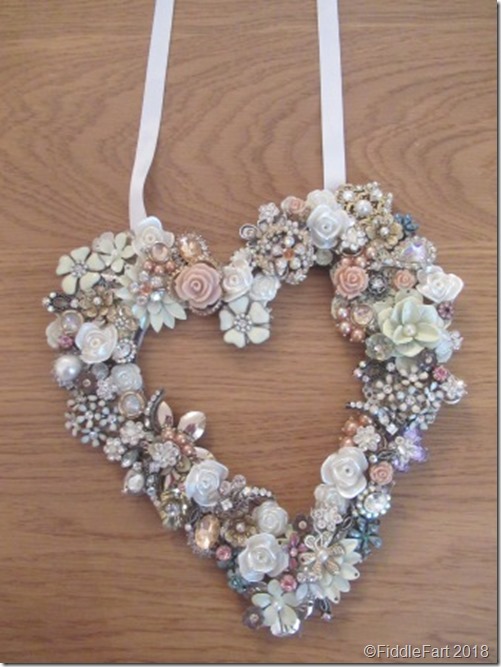
I used a MDF heart as the base and started by placing parts from a cream flower necklace in prominent areas and then building up the layers and filling in the gaps with bits and pieces from my box of broken jewellery. The only new “bought” bits used were two types of plastic, white rose embellishments from The Works. I was really surprised how much stuff I had that just seemed to really go together.
jewelled Heart
I used E6000 glue to keep everything in place and I now just need to remove the odd, stray, dry glue strand, as the pictures show, before I frame the heart  (the ribbon needs to go too).  It reminds me of something the Victorians would have done with seashells.
Luckily I have another couple of the spare heart bases so that I can have another go at making something that I can actually bear to give away.

I am also hoping to now post on a Tuesday for the next little while, objects of desire, heads up for what's crafty in the shops, the odd charity shop find, and drawers that will make up my next Advent Calendar,  the long crafty blog break really seems to have paid off.

Monday, 3 September 2018

Christmas Sampler Photo Frame

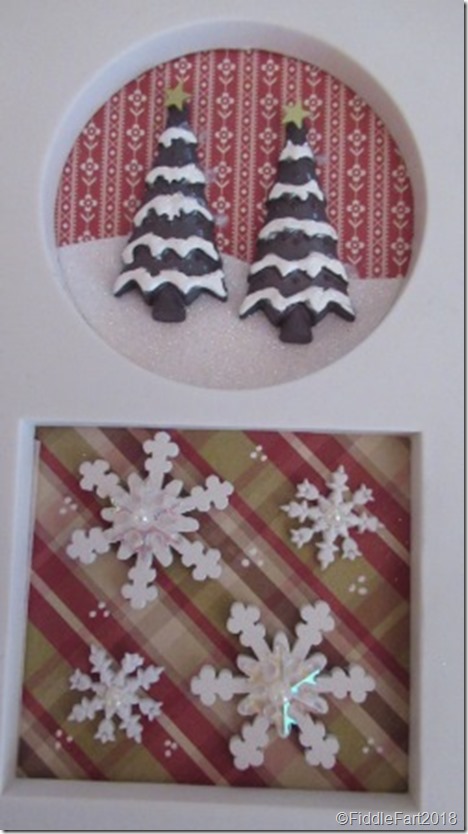
I have to admit that of late I have been very much a stranger to inspiration, but then suddenly out of the blue my brain went into crafty overdrive when I spotted this multi aperture photo frame Poundland in Worcester.
Christmas Photoframe Sampler
All those barren months and then ping, I couldn’t wait to get home with my find, knowing exactly what I was going to do with it.
Poundland Aperture Photoframe
The frame is made from a good quality plastic, and has some weight to it. All did not run as smoothly as I’d hoped because when I removed the glass (now in the recycling bin) as there was very little edge round the inside of the aperatures on which to glue each patch of background paper ……….IMG_8550
…… so the inside the frame is a bit of a dogs breakfast, but, when I repeat the exercise knowing what I know now I will be an awful lot neater, but there again, who’s going to take the back off and look at the mechanics?
Christmas Photoframe sampler.
It was then time to reek havoc on my embellishment boxes to find something to fit in each of the backed apertures. 
Christmas Sampler in MUlti photeframe
I’ve used a right mixture of laser cut wooden pieces, resin, and plastic.
Christmas Sampler Photoframe..
……. and then embellished them some more with Enamel Accents on the two Christmas trees, Glossy Accents on the wooden pieces, plus glitter, stars, flat backed gems and small buttons, it was hard to stop.
Christmas Craft Sampler frame
The finished article turned out even better than I had imagined.  If I can find any more of these frames or similar on my travels I will probably invest in at least another five.  As you know I prefer to give a lasting memento at Christmas instead of a card, something that can come out over the years. This first one will probably go to my sister-in-law.
As I already had all of the embellishments and papers collected over the years I reckon in all this frame has only cost me about £2.50 at the very most to make, considerably cheaper than an awful lot of individually sold Christmas cards.

Monday, 27 August 2018

Drawer Advent Calendar 2018

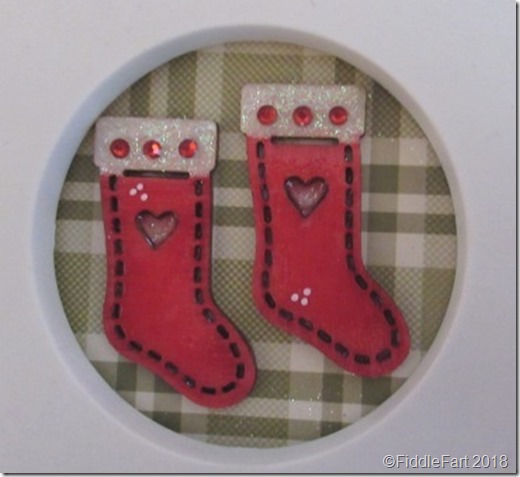
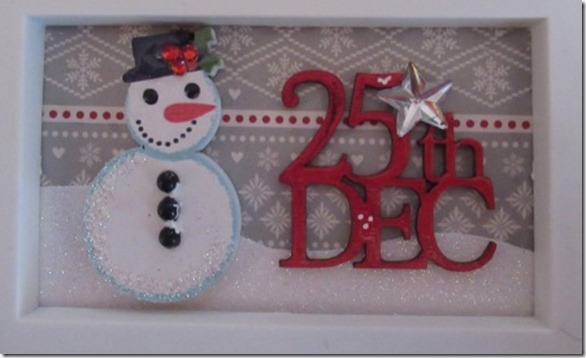
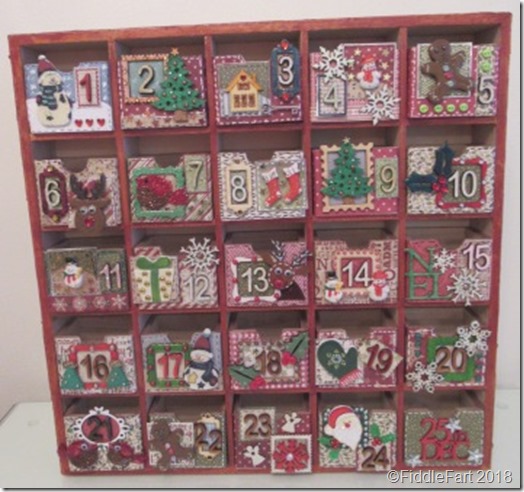
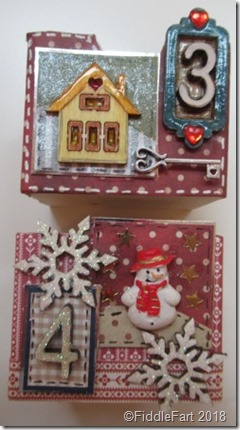
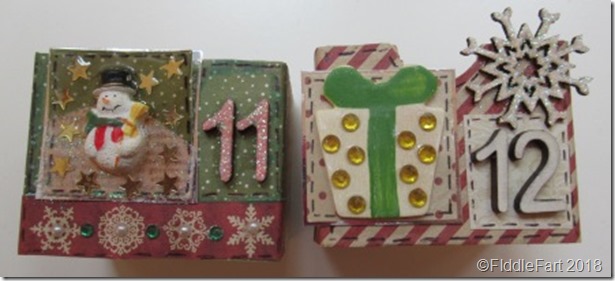
Yes, Christmas crafting has already started at The Towers with my first Advent Drawers of 2018 already under my belt. Not sure where this one is heading yet, but as I am planning to make a couple more I am considering looking at Etsy to perhaps sell them.
IMG_8442
The drawers came from The Works a couple of years ago, they cost £15 (but are currently out of stock online), so this wasn’t a cheap project.  However, I think if I decide to get any a couple more sets for this year  I will wait until I get a 30% off code before I order them.
IMG_8444IMG_8446
I used various Christmas papers from my collection but made sure all the designs were roughly in proportion to the embellishments I added.
IMG_8447
The laser cut Advent numbers cost £2.75 per set (with free P & P)  came from e-bay which I found I could colour and/or glitter according to each drawer design. https://www.ebay.co.uk/itm/3mm-MDF-Advent-Numbers-Arial-Bold/272435612759?hash=item3f6e6d8c57:g:cAkAAOSw3XlbWXRQ
IMG_8448IMG_8449
To embellish the drawer fronts I just rifled through all my boxes of bits, trying to cover as many themes as I could …….
IMG_8450
…… including blank and painted wooden shapes, resin and plastic embellishments ……
IMG_8451

IMG_8452
……. which I would then mat and layer or framed ……….
IMG_8453
IMG_8454
….. and then embellished some more with flat back gems, pearls, stars, buttons, glitter, googly eyes and Ranger Glossy Accents etc.
IMG_8455
IMG_8456
I reckon each drawer front took me at least 30 minutes to put together before putting to one side to dry …….
IMG_8458
……. before going back again  to embellish some more, sometimes several times over the days until I was 100% happy with no viable space left unfilled.
IMG_8459
The small frames I think came from The Works a couple of years ago, but haven’t seen them in stock for a while.  I only have a few left now and really I wish I could get some more as the proportions are just perfect to use either as a frame for the numbers or the embellishments, but so far my search for something of a similar size has proved pretty unsuccessful.
IMG_8460
However thinking toward my next calendar I did find some that are a little larger  on e-bay which I can mix and match with the remaining few, which will certainly change and dictate a new style of drawer front design, but then that is never a  bad thing as I get easily bored doing something over and over again to a formula.
IMG_8462
The last drawer front turned out to be the plainest, but after all the anticipation of the other drawers I thought I would let the day speak for itself.
So ……. give me a couple of weeks and then hopefully the next calendar should be ready for your perusal.

Monday, 20 August 2018

Plain And Simple Wedding Invitations

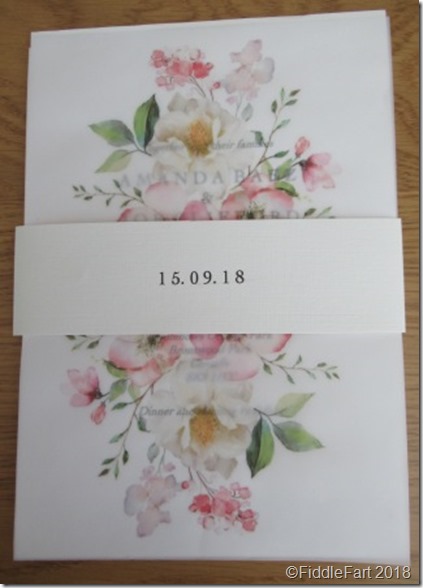
This is the wedding invitation pack I “made” for my nephews wedding this coming September.
IMG_8262
As you can see there isn’t really any crafting to them. The bride was very specific in her desire for an invitation made up of several layers of cards, that were plain, simple and classy, which probably accounts for them taking 3 months from the first moot to my being able to finally pack them in a box (with spares in case of accidents) and posted!  It also didn’t help that I am in Evesham while the bride and groom are in Stockport and that we never actually spoke in person throughout the whole procedure other than texts and e-mails.
IMG_8263
The band was always a requisite, and probably the fiddliest part as it needed an extra bit added in order to fit round the completed invitation pack including a hidden paper clip, with precision folds.
IMG_8506
Before arriving at this final white linen effect band (the card used throughout the project from Papermill Direct) I sent samples in pink and grey, also making pink, grey and white stamped seals using my Melt Pot. These ideas were quickly cast aside, as were the subtle placement of the odd “posh” flatback pearls and gems and requested vellum wraps.  We also toyed with putting the name of the bride and groom on the band but Amanda also discounted this because they couldn’t be centred aesthetically, Joe having less letters than Amanda.
IMG_8264IMG_8269
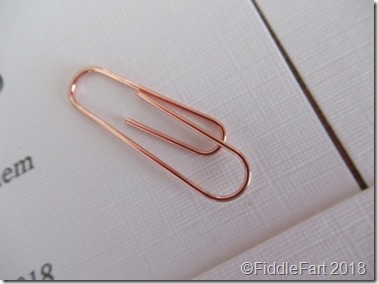
The rose coloured paperclips (Paperchase) were originally meant for the Save The Date cards that I had made previously, but they didn’t really go with the grey card used, but happily worked a treat under the band ….. so much attention to detail!
IMG_8265
The font was also an important consideration, there were two in the running, but in the end it was Cochin LT that made it through, sourced by the bride and groom and then downloaded by me. I had never seen or heard of it before. 
IMG_8266
The main headings of the invitation were set out in capital letters with a space between each letter and then the body of all the cards were in smaller italic.
IMG_8268IMG_8267
To be honest the whole exercise reminded me of my working days when I used to spend a lot of my time creating forms, leaflets and work sheets in Publisher 2003.  It’s all about hidden text boxes, spacing and then centring.  The Response Card took me the longest to put together for that reason.
IMG_8270
The final piece of the puzzle (everything came in bits over the months) was right at the end with the cover design (again sourced by Amanda), printed, after a little experimentation  on Crafters Companion printable vellum.  Then when everything was double checked and then double checked again, I was able to start printing and then cutting all the components parts to size before putting each pack together, this took me a weekend to do.
Did I enjoy the process? Perhaps not …….. but it was my wedding present to the couple.  It didn’t particularly get my creative juices flowing and to be honest could have easily been done at a printers, however, as a spin off my sister-in-law (the bridegroom’s mother) has asked if I can make her a wedding card incorporating the floral design and then a framed version for a keepsake …… so perhaps I can add my own touch of fiddle fart somewhere along the line, if not wholly endorsed by the happy couple!

Monday, 13 August 2018

To Blog Or Not To Blog …… That Is The Question !!!!!!

I know …… I have been a very long time away not posting and yes, as many of you presumed through your lovely comments (thank you) that I’ve been off and away doing lovely things, putting crafting and blogging on the back burner.

IMG_8277IMG_8273

It’s been a GOOD three months or so, when I celebrated my second year in Evesham, joined Slimming World (2 stone down so far), spent a wonderful week in Crete etc. etc., oh and I made the wedding invites for my nephew’s wedding, but more of that project in my next post.

IMG_8385IMG_8417

I have been very spoilt in the past having a “proper” craft room where I could just pick up a project whenever I wanted and then shut the door, now living in a small flat I have found that in order to craft two rooms get trashed. I am not a neat worker and as my mind flies here, there and everywhere box after box are opened and the contents scattered and to be honest the tidying up after a “session” got me down a little.

IMG_8347

I admit that when I first moved I rushed getting my second bedroom done, having little ones frequently sleeping over and friends/family staying over at least once a month I really needed a bed and a few bits of furniture in there, but, if I could do it all again I think I would have taken my time in designing it as a comfy craft room which included a sofa bed that could be folded away when not in use.

IMG_8348

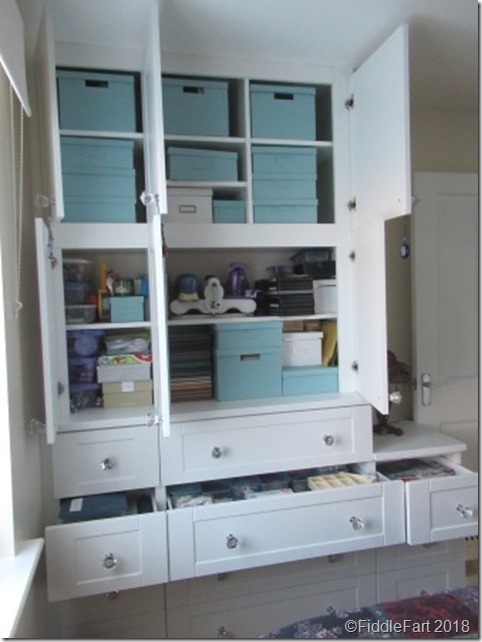
However, in May I had yet another re-think, even as it was the room, for me, didn’t flow, I never really liked the Ikea drawers I had put in there, the bedside ones were too low and the unit I had built on the wall opposite the bed just jarred on me each time I went in the room (as demonstrated by Darrell) ……..

IMG_8121

So I got the wonderful Mr Pete to come back and build new drawers either side of the bed to fit in with the shelf unit he had built last year and then, in my head, I wanted something that looked a bit like a dresser on the opposite side of the room to house all the boxes of craft stuff that were under the bed.  I tried to describe to poor Pete what was in my head and unbelievably he was able to draw a sketch, sighing at my need for crystal knobs and the rest is history.  When I got back from Crete Pete had worked his magic.

IMG_8350

I am thrilled, there is now only one box now under the bed, everything else is neatly put away and easily assessable, although I need to start labelling some of the boxes. I can now collect stuff from the drawers and cupboards without wrecking the room.

IMG_8351

So that’s got you up to speed. In September Iris starts school. I know, where has the time gone …. and Bertie, bless him, starts nursery, which means a bit more walking for me as Evesham doesn’t have the buses that Wolverhampton does, and my three days now increases to four days with them.  I can’t promise a post every Monday, but I have a couple of projects to post and with September heralding my busiest crafting period, I hope to follow on from these posts leading up to Christmas.

Tuesday, 1 May 2018

Tonertex Glitters – Flamingo Bag

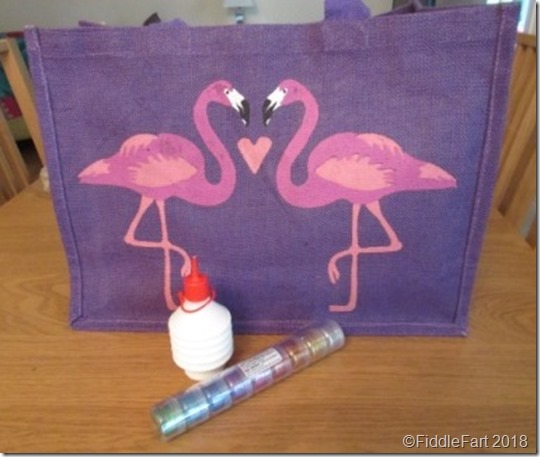
When Marc and I went to Crafting Live at Malvern I treated myself to a selection of Tonertex pens, foils, glitter and glue.  I must have seen this company a million times at various shows over the years, but this was the first time I had ever been tempted to get my money out. I have always wanted to “embellish” a faux or leather jacket for Iris and or Bertie, if ever I can find a suitable one/two in a charity shop, and this seemed the way to go.
IMG_7584
However the glue and glitters first outing was on something completely different, i.e this jute bag I found in my favourite charity shop for just 60p, flamingos are so on trend at the moment, it was a no brainer.
IMG_7880
I started by applying the Tonertex glue on the flamingos and heart …….
IMG_7881IMG_7882
…….. leaving it for about 10 to 15 minutes before applying the fuchsia coloured glitter.  I admit I was sceptical as to how it might turn out but resisted the temptation to fiddle with it until in the morning when it was dry ……….
IMG_7883
I was thrilled with the result.  The bottom of the left hand flamingo’s neck in the picture was a bit dodgy as you can see, but I was able to remove the excess glitter and glue quite easily using a craft knife, making the edge rounder to match the other one without ruining the whole effect.
IMG_7885
And ……. the glitter just doesn’t rub off, how brilliant is that! It does exactly what it says on the packet! All I had to do was brush off the excess glitter from the bag itself and add two black flat back gems for the eyes.
Now, the bag is double sided so I need to repeat the exercise again, but as I don’t have enough glitter left to do it, I’ve had to order another pot from the Tonertex website.  I wanted a new beach bag for my Greek Odyssey this year, and I reckon I’ve got one!