Wednesday, 10 July 2019

Hunkydory Steampunk Seahorse.

You just wouldn't believe how Marc and I went backwards and forwards and upside down on this project ..........

It was part of a review I was asked to do for Hunkydory, and in an effort to step outside my comfort zone I asked if I could "have a play" with their MDF Steampunk grab bag (which I don't think is available on their site at the moment). 

 ........ which I thought would also work with their  cogs and wheels embossing folder  https://www.hunkydorycrafts.co.uk/embossing-folder-cogs-gears.html
Marc and I started with the background, embossing metal sheet (Paperchase £2.50) which really worked well.

Spookily Marc had bought a couple of packs of  LaBlanche industrial puffy stickers with him .......

......... the drainpipes, joints and screw heads worked perfectly to frame the embossed metal which we had glued onto a shaped wooden plaque (The Works) .........

....... which we covered with black paper and simply aged for a leathery effect using DecoArt One Step Crackle with again very pleasing results. 
However it was with the seahorse when things didn't gel so well ....... 
We tried so many things to make it work. In the end I coloured the body and details with gold and blue nail art pens and then tried adding some rub on foil to the head and tail, but it just jarred with the both of us and looked pants. 

In the end, frustrated I just left it all in the drawer for a couple of months waiting for inspiration, then Marc remarked that I hadn't posted anything about it.  We both agreed that the problem had been that the tail had been left plain with no design etched into it and as a result it has been hard to find anything that seemed fit there.
However, with Marc's words ringing in my ears I returned home and decided to tackle the seahorse again ....... this time limiting myself to using the contents of two wheels of metal nail embellishments from Poundland.
I am afraid in doing so I have all but lost the steampunk theme with each tiny embellishment I added.

........ but, I think it works and it is finally finished. I think perhaps Marc will now be presented with it as a lasting momento of a very frustrating afternoon and following evening we spent together trying to get it right!

Tuesday, 9 July 2019

Two Jewelled Mirrors

Following on from yesterday, my two latest jewelled mirrors.
I apologise for the lack of any blow by blow shots taken while I was putting them together, but I got soooooooo absorbed in what I was doing it just slipped my mind.
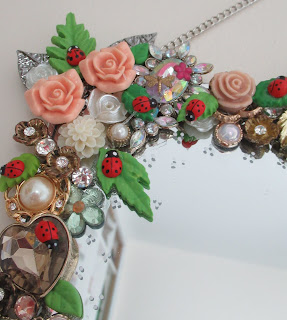
I found the mirrors with hanging chains in Poundstretcher for £2.99 each. As soon as I saw them I knew I could do something with them. I particularly liked the chains as I thought they gave the mirrors a retro sort of feel.  Ideally I would love to make a mirror using just bone china flowers like the clump I put in the photo, using old chipped brooches or taken from plaques, but although I will keep my eye out for pieces at rock bottom prices, it could very well prove to be too expensive an idea ...... we shall see.

That said, I got out my broken jewellery and first divided the pink roses (from Poundland bracelets) in two piles so that there would be at least a little symmetry between the two mirrors.  Using E600 glue I started working in the four corners of each mirror, before gradually filling the sides with pieces of roughly equal size, followed by layering above and below with smaller bits.

Spookily enough I had spent the previous evening using up all my old green Fimo making leaves of various types and sizes using moulds given me a while ago by my crafty friend Di Wray.
It wasn't my intention to use these leaves on the mirrors, but after walking away from the mirrors for an hour or so and then going back to them I thought why not give them a try and I think, it worked.
The addition of wooden ladybirds was totally at odds with my original idea .........
....... however, I just got to thinking that it be really lovely for Iris and Bertie to play spot the ladybird when we have one of our sleepovers .........
...... and again, I think they work. For now I am leaving them matt, however, I may perhaps paint them over with a little Ranger Glossy Accents some time in the future.
I think the mirrors have turned out really well as a variation on others I have made in the past ........ I am now wondering if I could make something similar for Christmas using some of the many wooden snowflakes I have collected over the past couple of years .......... hmmmm, another £5.98 and trip over to Poundstretcher me thinks!

Monday, 8 July 2019

Fiddle Farting At The Towers ........

Can you believe I have been in Evesham for 3 years now? After initially having quite a lot of work done, mostly in the guise of built in cupboards, drawers and shelving in the two bedrooms I have always had the sort of feeling that there were still a few bits and pieces that needed fiddle farting with but not sure what.

Originally I had all the walls painted in "Natural Calico" (not as yellow as "Magnolia"), but recently I have been craving a little more colour, something I am not that confident with, but finally I took the bull by the horns, though I loathe painting with a passion, starting with in the guest room ......... 
....... nothing major, just a feature wall in Johnsons Caribbean Tide (B & M Bargains), however I can't believe the difference it has made and am sooooooo chuffed.

It all started with my ordering the yellow embroidered/mirrored cushion covers from Amazon (India), I had searched high and low for something "yellow" but to no avail, and OMG the price of anything remotely similar from hippy style shops was stupid ...... I can't afford £15+ for a single cushion cover!
So can you believe that these five covers cost me just £13.60 with free P & P as long as I didn't mind waiting four weeks or so for them to come.  At just £2.72 each, they were a no brainer! Guessing the colour was a bit of a risk, but when they finally arrived they were perfect. 
https://www.amazon.co.uk/gp/product/B00HV76ADG/ref=ppx_yo_dt_b_asin_title_o05_s00?ie=UTF8&psc=1  I also have two spare, but they may posssibly go on my own bed (as I have plans for that room too) or I can simply put them on e-bay, which could also part pay for the other three too! 

I had already moved the beaded Moroccan style lamps that I have always had in the room into the lounge where they look much more at home after Marc and I spent an afternoon adding yet more coloured beads to the shades.  I then got out the silver stick lamps bases (Argos) I have put away for Christmas and added new yellow/mustard shades, again from B & M Bargains, for just £2.49 each.  I wasn't 100% about the colour, but again they worked out well. 

I have also had a rejig of some of the things on the shelves, like swapping the trio of red vintage children's suitcases for a lighter patterned set from The Works (which I already had) and the dark green glass fishing floats for a Poundland rabbits (although they too might get replaced in time). The two sets of tea light holders either side of the shelf unit will also be for the chop in time, which means I can have fun looking for a few more yellow or turquoise bits when I am on holiday and charity shop shopping to help further brighten up the room.

While I was at it I also made a couple of jewelled mirrors to put on one of the side walls, but more of them tomorrow .........

It is all a bit on the feminine side I admit, but the chances of me ever having a big, burly gentleman guest to put up, I am afraid, have long since passed !!!!!!  

Thursday, 4 July 2019

Heads Up - The Works Origami Stacks

Just a quick heads up today ........

........for two new origami stacks from The Works.  They cost £5, but if you subscribe to The Works website you get some fantastic online only deals, I always try to take advantage whenever there's a 30% discount on offer. I also have a loyalty card which also comes in very handy at the end of the month if I have earned enough points for a free something or other.
The papers measure approx 6ins x 6ins.  There are 24 different designs in each stack of over 400 pages.  I would say that it isn't the thickest/strongest of paper (because of it's origami nature),  I don't think I would perhaps use it to cover the whole of a card front (but I need to play) however, as a background to a design or side/top or drawer front of an Advent calendar they are just perfect. 
 It's the proportion of the designs that I particularly like ..........

....... they are perfect for the scale I usually work with, as above.  I haven't tried die cutting with the papers yet, that's an experiment for another day.

Wednesday, 3 July 2019

Beaded Chandalier

Help, I need saving from myself .................. remember that beaded charity shop light shade I got the other week for just 80p?

Well, I dismantled it ...........
............. and added strands or sets of two or three beads to the light fitting in my spare bedroom! Lets just say it's filling up nicely and is erm ........ very me!  And. if I found another similar shade in perhaps a different colour would I buy it? You bet I would, I think my overall aim now is to eventually replace all the clear beads for coloured ones. I am bonkers, I know.

I have quite a few beads left over so when I have the time I plan to swop them over with some of the purple and amber beads on the two Moroccan style lamps in my lounge. I just need to count them out, so I know I have enough for both lamps to be as close as I can.  What am I like?

Tuesday, 2 July 2019

Simple Christmas Tree Card

This card measures 5 1/4 x 5 1/4 ins.

I feel that this has got to be the biggest cheat of a card ever.   I wasn't even sure I should really post it, but it does reflect my current mood and taste for making very simple cards at the moment and, to be honest, if I had seen a card like this when I first started out crafting it would have given me the confidence to think yeah, I could do that, without needing a huge pile of stuff and a million and one tools. 


I simply covered the front of a hand cut card blank with a page from the embossed Christmas paper pad I found in Poundland before Christmas, which contains quite a few designs that could stand on their own without embellishment or mat and layering.  I thought the subtle greys, mustards and teal were also very on trend.

The sentiment came from a pack of 6 from Hobbycraft's Christmas sale for just 50p.  I wasn't sure if it would go, but I think it works as it stands out from the background.

I did wonder about adding Glossy Accents or a little translucent micro glitter to one of two of the trees, but I don't think I will ...... it's enough as it is, even if it does feel like cheating!

Monday, 1 July 2019

Christmas Tree Shadow Box

With no urgency as regards to time I have been making minimum bids on various Christmas Tree brooches from China.  If the bidding goes up I just leave it and don't bid any higher as I know there will always another one to go for.

The tree used in this idea cost me just 79p and no P & P!!!!  How do they do it?


The 10cms x 10cms box frame came from Hobbycraft when they were on offer for half price at £2 (I  doubt I would ever have paid £4 for one).
 

I just made a simple background using a glittery, embossed snowflake design paper to which I added a few tiny clear flat backed gems to give a bit of  Christmas extra bling.


I removed the fastening from the brooch and then stuck the tree on to the paper using E600 so I could be sure that it wouldn't come loose.
I then added faux stitching with a black fine liner pen to the mount.  I wanted to repeat this round the edges of the frame but for some reason permenant marker pen just didn't adhere to the finish,  I wonder why?

I seem to be a little obsessed at the moment by sticking snowflakes to all the frames (and sometimes the glass) I am using,  but again, as it's for Christmas I think it works ...... but, if I change my mind I used PVA glue in the first instance as they can be removed carefully without (touch wood) damaging the finish on the frame.

Wednesday, 26 June 2019

Let It Snow Penguin Card

Following on from yesterday Marc pointed out that every drawer I’ve done was also a Christmas card design in the making.  Of course he was right and when I thought about it, it was also a useful way of using some, if not all of the (Flying Tiger) stickers, papers and embellishments I have left, minus the numbers.
So, this is the card I made taking yesterdays drawer as inspiration.  It measures 5 1/4ins x 5 1/2ins and is made using a handcut, white linen effect card blank.
I am really chuffed with how it’s turned out. Now I need to look at all the other drawers and the stickers I have left to see if I can use/re-create a few more of the ideas/designs with perhaps a slight amendment here and there to turn them into cards as well .

Tuesday, 25 June 2019

Revised Snowman Baubles

My snowman baubles from last week sat on the table for a day or so and then started to get to me, they were just a little too plain ...........

Christmas is one of the few occasions when too much is never enough, if that makes any sense?

So I found out some very small wooden tags I already had.  They were far too dark use as they were but when coloured over with a white Posca Pen and then the sentiment added using a black fine liner pen they were perfect.

I added pre tied festive bows (from The Works, I think) to the plain red hanging ribbon, putting a small plastic snowflake in the centre. 

Adding the tags was a right fiddle fart, trying to get them to sit neatly just under the ribbon, but I got there in the end.

The baubles look sooooooooo much more festive than they did before  ........ I am now really happy with them ......... so no more fiddle farting with them Mrs Geddes!!

Monday, 24 June 2019

Shadow Box Christmas Picture

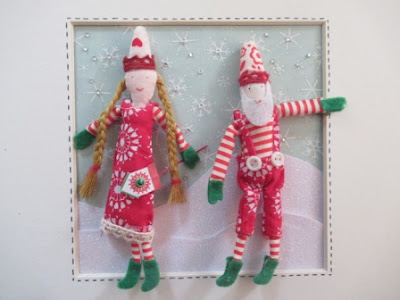
I am really, really chuffed with how this Christmas shadow box has worked out.
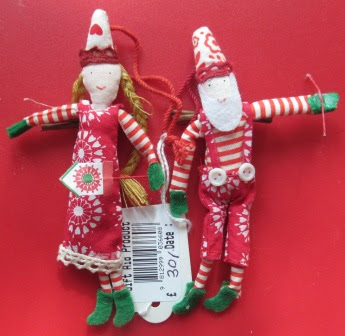
The little, festive, fabric dolls cost me all of 30p for the two in an Evesham charity shop, in the run up to Christmas last year. As soon as I saw them I imagined them in a box frame and at just 30p it would have been rude not to have bought them.
The Ikea Ribba frame cost me £1.45 from a Tewksbury charity shop.  I picked it up and ummmed and ahhhed before putting it back, only to later think that it could have been a very useful purchase, so I went back the next day to find, thankfully, it was still there.
I created the simple background using a glittery, embossed snowy paper and two layers of white glitter card.  I added a few tiny, clear, flat backed gems to the centres of the snowflakes for little extra but subtle bling.
I faux stitched around the mount with a black fine liner pen.  I wasn't sure about doing it,  but I think it's worked pretty well with the folksy look of the dolls. The dolls were secured to the background using glue gun glue.
I wasn't sure either about adding the snowflakes to the glass front, would it be too much? Again,  I think it's worked, but if I change my mind I only used PVA to attach them, which is easy to remove.  I The white dots were made using a Posca Pen, also easily removed if need be.
I reckon in all this project cost me less than £2 to put together for a complete, never to be repeated, one off. I am not sure at the moment where its going to go, whether I'll keep it for my own festive shelves or give it as a present, but I've got plenty of time to think.