Friday, 19 May 2017

My First Order From Every Crafts A Pound

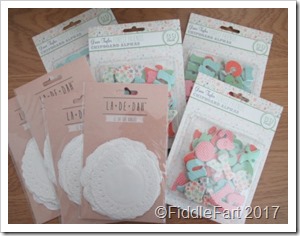
While I was staying with Marc a few weeks ago, he told me about Every Crafts A Pound, http://www.everycraftsapound.co.uk/ and as I am always up for a bargain I thought it would be rude not to have a look ….. and despite an iron will, I put in an order!  Having looked at the items they had on sale I have a feeling that I may have bought a couple of things from them at the Hobbycraft Show at the NEC, as some things looked familiar. I was especially pleased to see that they had the cardboard rings and hearts that I kicked myself for not buying at the time, as I have had a few ideas for seasonal door wreaths since then. IMG_2460When the box arrived it was crammed, it was just like Christmas as I had forgotten some of the things I had ordered,  in all I received 46 items (some duplicated), with prices ranging from 25p to £3, so I am well chuffed. (P & P free on orders £40 – I didn’t spend quite that much)
IMG_2463I ordered quite a lot of patterned paper pads and packs, as the prices were so good, I especially love First Edition papers because of the quality and designs, but I always baulk at the price (when not reduced) but at £2 and £3 I am not going to argue.
IMG_2469I presume that some of the papers and ranges may be discontinued (?), but though there are trends in crafting/card making, for me paper and embellishments have no use by date. I ordered, subconsciously, quite a few bits from the Paris inspired Tonic Studio and Dovecraft ranges because I just like the romantic, subtle coloured theme as well as having a thing about the Eiffel Tower at the moment …….
IMG_2518I have wanted some rub on transfers for glass pendant decorations for ages, so the Tonic Studio Parisian Transfers for just 25p per pack were a no brainer.
 IMG_2471IMG_2464
I ordered several packets of pockets and doilies, again at just 25p a pack plus some washi tape, thinking perhaps about making scrapbooks with/for Iris and Bertie.  At the moment Iris is obsessed with making at least one card a day for one of her toys, Kermit, Elmo, as well as various relatives, and at 25p a pop I can afford for her to use all the pretty things her heart desires!  The chipboard alphabets were 50p for 39 letters, again something I had been looking for but was being mean when looking at the prices in the shops.
IMG_2467
The bows, well I am not really a bow sort of person but thinking of Christmas, and a couple of projects I have done recently, like my craft stick fairies, I think they could come in useful.  The chunky silver gem ribbon comes from Marc and I bouncing ideas off each other. I think the individual hard plastic hearts and butterflies will get cut up to use individually and some used on a jewelled mirror I have in mind.
IMG_2466I have not featured all the items I ordered, however a bargain is only a bargain when you actually use them ……. so I had better crack on!!!http://www.everycraftsapound.co.uk/

Thursday, 18 May 2017

A Gothic Punk Style Popsicle/Lolly Stick Fairy

I am still experimenting with my fairies, this time going a little Gothic, inspired by some black feather butterflies Marc sent me, many moons ago, in the early days of our friendship.
Popsicle stick Gothic Fairy with Butterfly wings I think this one may be my favourite so far.
Halloween popsicle fairyInstead of using cake cases as I have before, I used a large, scallop edged punch to make a short, and full, five layered skirt which I think makes her look a bit punkie/gothic in style.
halloween popsicle fairy 1Halloween Popsicle fairy 3
I made a small slit using a craft knife in the centre of the all the layers to push through the fairy’s body.
Halloween popsicle fairy cI wrapped wool round the top for hair but to go with the darker style, coloured it with a black Sharpie pen. 
Popsicle Stick Gothic FairyNatural coloured wool and wooden beads create the arms and hands ……
popsicle fairy hands …….. and one of Marc’s butterflies makes her wings, with a few clear, flat backed gems for some extra fairy bling.
Popsicle Stick Fairy with Butterfly wingsWhen stuck down with a glue gun the butterfly wings hid the back of the stick and safely secured the arms.  I could cover the centre back of the butterfly if I was being really pernickety.
popsicle stick fairy feetI used tiny gems on the fairy’s slippers and top and a small gem flower in her hair.  If I could improve her any more, I might add a little Ranger Glossy Accents to accentuate and shiny up her slippers.
A thread looped through the fairy’s hair would be easy to add so that the fairy could be hung on a Christmas Tree.
I hope you are not getting sick of my fairies, it’s just that as soon as I make one, I get another idea, and, though I love making cards, at the moment I have a very limited outlet for them, I would rather keep having fun making lots of different fairies with the intention of giving a selection to family and friends, instead of a Christmas card to put on their tree, to come out, hopefully, for a few years to come, rather than a card that generally just put out for one Christmas only.

Tuesday, 16 May 2017

Christmas Snowman Altered Domino Christmas Tree Decoration

I found a box of “proper” white dominos in a charity shop for £1.99, well, it would have been rude not to buy them. I have seen dominoes used for making pendants and decorations with stunning results before and thought that this would be my opportunity to experiment on a budget.
snowman domino 3Compared to other ideas I have seen this is very amateur attempt, but it’s a start.
Christmas Domino ArtI started by directly stamping on the domino using StazOn ink, let’s just say it took quite a few attempts to get it right, and the image is still not as crisp as I would have liked.  If I were to want to use a stamp on a domino again I am afraid I would create the whole scene on a piece of paper cut to size, which I would then glue to the domino. The StazeOn wouldn’t completely come off the dominos from my unsuccessful stamping attempts, but no doubt I will find ways of covering it up on later projects.
Christmas Domino Decoration Domino ArtChristmas Domino 1
Once successfully stamped I coloured in the image, added the sky with a Sharpie pen, with added silver stars and snow using  translucent micro glitter, followed by a good layer of Ranger Glossy Accents.
snowman dominosnowman domino 1
Once the Glossy Accents was set, I put a narrow strip of silver adhesive foil round the edges of the domino, it went on like a dream!  I then drilled two tiny holes at the top and the bottom of the piece to hold two equally tiny eye screws.
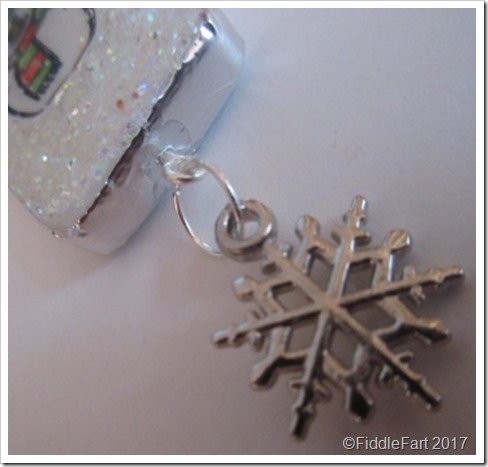
snowman domino tI used E6000 glue to help secure and keep the eye screws in place.  Using a split ring I attached a snow flake charm to the bottom screw loop. I now need to find some very narrow white or blue ribbon to thread through the top screw, with perhaps a small bow and/or tiny jingle bells, so that it will then be ready to hang on a Christmas Tree or used as a tag on a parcel.

Sunday, 14 May 2017

Little Robin Christmas Tree Decorations

I have discovered mini craft sticks in The Works ……. and these little robin decorations are the result of my first experiment with them.
Robin Craft Stick Christmas Tree DecorationRobin CRaft Stick Christmas Tree Decoration aaa
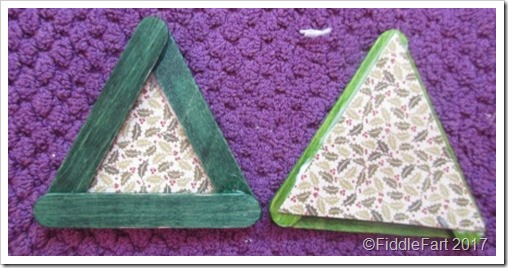
I started by deciding that I wanted to use them in a triangular shape, then coloured enough sticks on both sides with green Sharpie pens to make three decorations.
mini craft stick christmas tree decoration with robinmini craft stick robin christmas tree decoration
I glued the sticks together using E6000 so that they would be securely stuck, but PVA would have worked equally as well.
Mini Crfat Stick Robin Christmas Tree DecorationsI then cut six holly patterned triangles as the background, sticking two back to back so that they were double sided for a neat back, as you may have realised I am a bit anal about the derrieres of my tree decorations, in case they twirl round and expose a tatty backside!!!
Mini Craft stick tree decorations
I also added a metal pendant loop to the top of the back so that a ribbon can be threaded through to hang on the tree.Mini Craft Stick Christmas Tree DecorationsThe final touches were made by finally adding the glittered paper robins, their feet and faux stitching round the edges using a white gel pen.
Robin CRaft Stick Christmas Tree Decoration bLooking at the pictures now, I think they need a little something else to really finish them off, a small red bow and perhaps a pair of jingle bells at the top????  I will post another picture when I have found some suitable ribbon, what I have at the moment is too thick, and you know me, it’s all about the proportion!

Friday, 12 May 2017

Off To London ……. And An Object Of Very GREAT Desire!

As you know, it’s Eurovision this weekend …….. last year I was there in Stockholm with Rick, Marc’s partner for what, for both of us, was a dream of a lifetime, and I know on Saturday night we will both be wishing that we were there again this year, but there was just something about travelling to the Ukraine that made us hesitate about trying to get tickets.

Eurovision 2016However, on Friday I will be travelling down to London for a long weekend with Marc and Rick, having already sat through all the semi finals to familiarise myself (as has Rick, no doubt) with all the runners and riders ……

Eurovison 3It is entirely probable that several small vodka and cokes will be enjoyed, along side a box (or two) of Maltesers and other such delicacies, with both Rick and I keeping our fingers firmly crossed that a more accessible European country will be the victors so that perhaps we could have another bite of the Eurovision cherry …… and, if we do, Rick is determined that we will be standing amidst the throng at the front ……. and that would be so, so brilliant!

In between the Eurovision brouhaha I think Marc and I are going to have a go at soldering, Marc having just bought a soldering kit in order that we can continue our quest (now in its four year at least) to make “the perfect” microscope slide Christmas decoration and other potential jewellery charms ……

And my object of GREAT desire ………..

tri. bbbbbbI have always, always, always wanted an adult tricycle, you just wouldn’t believe how much …… and this one was just £300 and didn’t even look like it had been ridden. Sadly, it will have to remain where it is, as I just don’t have anywhere to keep it, it’s quite large and my flat is very small, it would fill my whole hall and I couldn’t live with that.   I might just have a look on the estate to see if there is a bike shelter ……… but for now, to quote the late Matt Munro, I think it will have to remain “The Impossible Dream” …….

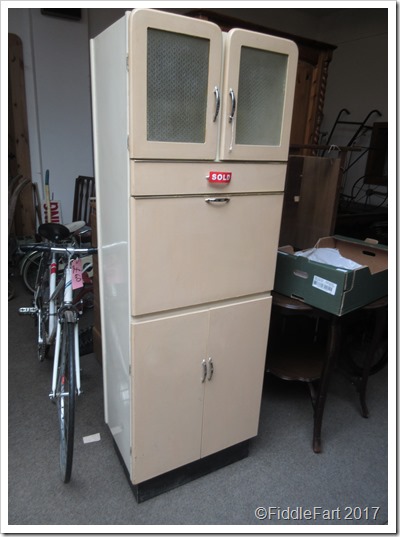
triIn the same shop as the bike was this 50’s/60’s kitchen cabinet, it’s quite an iconic piece (see below)  ….. it’s not to everyone’s taste, but I love it.  I keep on saying I need two flats/houses, one to live in and one to do up.  My flat is modern with no quirks at all …… if ever I win the lottery, I would definitely buy a terrace type house just to indulge my hobby!

Wednesday, 10 May 2017

What A Total Crafting Mess! – Something To Make You Laugh Today

Sometimes things start out well, and then go horribly, horribly wrong! Sometimes you can turn it around if you put something away for a week or two and then go back to it, but on other occasions you should just have the good sense to bin what you’ve done and forget about it!
Christmas Crafting Disaster……. And that’s exactly what I should have done here, instead of heaping layer upon layer of more mess!
Domino Christmas DecorationsAleene's Pendant Gel. Domino Christmas Decorations
All started well, when I covered a few children’s picture dominoes with blue paper and glittery, self adhesive snowflakes, followed by a layer of glossy accents.
disaster diaster 1
But when they were dry I didn’t know what to do with them, in my head I wanted a snowman’s head coming from the side ….. but as I didn’t have a stamp or any suitable embellishments, I thought I would just add a “casual” Let It Snow sentiment printed on my computer instead ….. plus another layer of accents and some stars  …… but the ink ran!
So instead of cutting my loses then and there, I hand wrote Let It Snow again in biro as I knew that wouldn’t run and stuck it on top of the original wording and added more flipping stars. Why mix stars and snowflakes, goodness only knows?  And as you can see all I did was create a hideous mess, now thankfully in a landfill site up the road!  But I hope I gave you a chuckle and what the …..? moment!

Monday, 8 May 2017

The Twelve Frames Of Christmas – Festive Patchwork Box Frame Decorations - No. 3

This is No. 3 of my 12 Days of Christmas patchwork shadow box frame with which I plan to deck my festive halls for Christmas 2017.
CHristmas Patchwork Memory Box 8Below is how it started out in the planning stage
Christmas Patchwork Box FrameHowever, as the final gluing started to get underway, things got rearranged again, and then, there’s no going back, all that’s left to do is the fiddle farting with flat back gems, googly eyes, stars etc. I am not too sure about the “weird” red angel with the stripy hat, from the look of her attire and nose, she’s started to celebrate Christmas already! 
CHristmas Patchwork Box FRame 6

Saturday, 6 May 2017

Sharpie Painted Plate

This plate was just pure relaxation, adult colouring books don’t really do it for me, if I used one colour that I thought looked wrong I would just get disgruntled and the page left as it was to annoy me, but just doodling and colouring as I went along certainly soothed this savage beast!
I used an old Ikea plate (diameter 19.5cms) I already had in the cupboard, it was a little scratched, but it was soon covered up.
Sharpie Pen Handpainted PlateI just started doodling and just let it flow from one thing to another as the pictures show ……
Sharpie Pen Painted Plate 1Sharpie Pen Painted Plate
I used Sharpie pens for the design.
Sharpie Pen painted Plate 6Sharpie Pen Painted Plate 3
POST NOTE: Before baking in the oven, I let the plate dry for about 48 hours to make sure it was really dry,  I then baked it slowly in the oven at 130c for two hours after reading several articles on the net on the best ways preserve/secure the ink from the rigours of washing up - http://www.destinationdecoration.com/the-ultimate-guide-to-sharpie-mugs/ - however, this did not work, the temperature was not hot enough and an awful lot of the design came off in the first wash ........  I am now in the process of more experimentation, however, with a higher temperature comes risk the fading of the pre-baked brilliant colours ....... (please also see added comment left by anonymous reader below)
Sharpie Pen painted plate 7If I was being critical, the “flower” in the middle is well off centre, but as this plate is just for me and my marmite and toast to brighten my morning, it really doesn’t matter that much!


Re my ink adhering problems, this comment was left in my comment box, for which I am very grateful ..........

"That is GORGEOUS! I don't know if this will help, I've tried using Sharpie markers before and found they didn't "bond" to the ceramic, when I looked into it I found that most of the tutorials I'd read were American and their "standard" Sharpies seem to be different to ours (from memory I think it was something to do with alcohol content) I found some UK bloggers had had success by giving the ceramic a light sand before colouring in but even then they'd had issues. Hope your experiments go well and you find a technique that works, the plate is lovely & I'd love to have a go again. Maybe any overseas readers can help as they don't seem to have the problems we do in the UK. If all else fails you used to be able to buy a clear glass paint that you baked in the oven (it was designed to be used to tint and lighten coloured glass paints) - a layer of this would seal the design but can't remember if it was food safe or not? Good luck with your experiments."