Thursday 29 August 2019

Framed Aqua Bead Pictures

With Lucy's birthday coming up Iris and Bertie naturally wanted to make something very special to give to Auntie Lu Lu ........so out came the Aqua Beads.
Iris has become something of an expert in using them and is now confident enough to change the colours from those on the template. After making her little girl figure and fish she then created a background on which to set them, before I found a box frame to put her creation in.
Bertie, not wishing to be out done by his big sister asked if he could do one, putting together his first ever aqua bead penguin with only the minimum of help from Nanny. He was sooooooooooooo chuffed with himself.  I have a feeling that this could very well be the first of many.  I am thinking, using said penguin design, that we also have the makings of a few more small fairing Christmas presents to put together during the run up to Christmas.
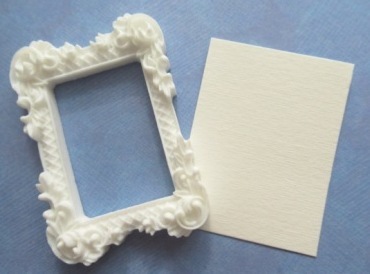
I have quite a stash of small white picture frames under the bed for such occasions. Seeing their pictures being framed helps give little ones a real sense that their work is valued, as well as being a present that just cannot fail to melt any heart, especially those of Great Grandma's and doting Aunts.

Wednesday 28 August 2019

6th (Iron) Wedding Anniversary Card

This card measures 5.5ins x 5.5ins and is made using a handcut grey coloured card.
Tom and Laura been married for six years this August.  Where has the time gone?   The traditional gifts associated with six years of marriage are either sweets or iron, so with Tom being a scientist I decided to go down the chemistry route for the theme of their card, chosing to cut a grey card blank as it was the closest to an iron colour that I had and then finding the chemical name for iron, not being the slightest bit scientific I didn't have a clue, doh! 
I coloured over the multi coloured patterns of an uppercase "F" and lowercase "e" with a black Sharpie pen to make them look more "proper" looking.  The small 2 and 6 came from a Tim Holtz Idea-ology label letters pad.
The silver card frame came from a pack of 30 from The Works (£3).  I ordered them blind from The Works website as they must have been really new and no picture was available, but I was really chuffed when they arrived, and will probably order another pack before they disappeared. 

I put a scrap of white card behind the frame, added the letters and numbers and then positioned the whole frame in the centre of the card blank, it couldn't have been any more simple, which is very much my thing at the moment. 

Tuesday 27 August 2019

A Snappy Happy Birthday Card

This card measures approximately 5ins x 5ins and uses a hand cut, white linen blank as its base.

I made this card for my brother-in-law Graeme and to be honest is a bit of a hodge podge of stickers.
I started by making the background for the wooden Hobbycraft frame sent to me very kindly by Paula, a Fiddle Fart follower, a little while ago.
I then added a mix of  two different sets of small alphabet stickers for the sentiment ............
...... before deciding that the frame would look much better if it was coloured with a red Sharpie pen.
I then built up the picture using an assortment of Paperchase (parcels, bunting and stars) and a puffy Hobbycraft crocodile.
I just love the crocodiles face ....... but adding a pair of tiny googly eyes made him look even cuter.
A few clusters of three dots here and there using a black fine liner pen help bring the card together.
.......... Another card done and dusted.

Monday 26 August 2019

Simple Flower Pot Card

This card measures 6ins x 6ins.

Make no bones about it, this is a very simple card.
I recently nipped into Hobbycraft and found that their packs of 50 6ins x 6ins blank white cards had been reduced from £5 to £2.50.  I haven't used pre-cut cards for years now after I had a run of cards that weren't the best quality, however, since I have started to completely cover the fronts of some of my cards with different papers it seemed a bit wasteful to use my usual top quality white linen card on them, it seemed a no brainer to give these cards a try again, especially with Christmas looming on the horizon.
On this occasion  I covered the card blank with a natural linen effect paper (how ironic is that!?)
........ and added the three potted flower embellishments from this pack of Poundland, dimensional, doodle effect stickers, which have a very professional looking acetate front.
I then hand wrote the sentiment, using a black fine liner pen, which I mat and layered on silver mirror card.
Finally I put a flat back pearl in the centre of each flower, which, if I am honest, didn't really add anything to the overall appearance of the card, however on the other hand I always think that adding a few clusters of three dots here and there helps to bring a card together.

Wednesday 21 August 2019

TEN YEARS OF FIDDLE FARTING!!!

I can't believe I missed my 10th Anniversary of blogging, by one single day.  I had an inkling that it was coming up soon but I thought it was in September, then when I went back to my very first post this morning, I saw that I had started blogging on Thursday 20th August 2009.  Ten blooming years and one day ....... who'd have believed it ........... that's 2,426 posts - that's an awful lot of ideas/projects, observations, and objects of desire  ....... it makes my mind boggle.  

Times and circumstances have changed beyond anything I could have imagined from those early days, but through thick and thin, good and bad I've usually had a post or two in the bag ..... and when I have felt that I didn't have the heart (or imagination) to carry on so many wonderful, followers gee-ed me up and kept me going, and that applies to my Monkey blog too.

Both blogs have kept my mind whirling with so many ideas, kept me sane, kept me looking for new things to use, delving in every charity shop, craft shop, Poundland, discount store car boot for anything interesting, and made me see and look for all the funny things in life ...... as well as always being there to prick my conscience to keep those posts coming........ 

So here's to another ten years ????????????  Happy Anniversary to me and a huge THANK YOU to you all for all your kind comments, e-mails, presents and most important of all popping in every day.  THANK YOUxxx

THANK YOU 

Crafting With Iris

Just a couple of little "plaques" today, made by Iris using bits and pieces from Nanny's drawers of treasure and wonderment.
She likes to bring her chosen "swag" to the table and then I let just let her run with it. Iris always has a very clear idea of what she is going to do so I can sit back with my chai latte, watch, listen and ooooo and ahhhhh in all the right places.  The only contribution I really make is if I think of another twiddly bit that she might like to add but had missed in said drawer.  

I just adore all her drawings, they are changing slowly and becoming a little more sophisticated with influences from school, but at the moment they are still so pure and innocent and very Iris.

Tuesday 20 August 2019

Eye Spy Christmas Tree Ornament Puzzles

THIS IS NOT MY IDEA - it's something I found on Pinterest and thought was sooooooo brilliant that I really needed to have a go myself.
I needed to order some seamless plastic baubles first, I have some lovely iridescent glass ones, but as these baubles are meant for littlies using them would not be very sensible or safe.
I found these seamless 10cm baubles on e-bay - 8 for £5.79 (with free P & P) which works out at just over 72p each which is a no brainer.
They are more than big enough, however I have since found some that measure 8cm, which may work just as well, it all depends on the size of the hole at the top as to what might easily pass through it or not.

I rifled through all my Christmas embellishment boxes and found an assortments of bits and pieces to be "spyed" in the bauble.
I also already had some "pretend" iridescent snow .......
...... which I found was pretty easy to get into the bauble using a small plastic spoon.
I then simply added all the festive bits and pieces to the mix ........
....... before giving them a good shake.  I don't think it would hurt either to add some strong glue round the top of the bauble to prevent curious little fingers trying to prise the lid off.
I handwrote the tag, listing the contents, which I then tied to the top of the bauble. Voila!  Such a simple idea, but whoever thought of it was a genius!  I will probably make a couple for Young Master Bertie to take to Nursery for their tree when the time comes, as well as one each for Iris and Bertie and a few of their special friends.

I think I might also try using small polystyrene balls (not sure if I can still get them as they can be sniffed up and are therefore a health and safety issue????) but if I can they might not disguise the bits and pieces as much as the flakes I have used.   I may even add a bow ....... it's an idea to keep playing with and improving, but I'm pretty happy with my first effort so far.

Monday 19 August 2019

Mickey Mouse Birthday Card

This card measures 5ins x 5ins and is made using a hand cut, white linen effect card blank.
This is the card I made for my daughter Lucy's birthday this year.  The whole family (Tom, Laura, Iris, Bertie, Lucy and I) have all booked a holiday in Disneyland Paris in July next year (2020) and while we are there it will  be Lucy's birthday (again), hence the "this time next year ....." sentiment.
The Mickey Mouse "embellishment" was actually the price tag from a pair of Mickey Mouse pumps I found reduced in Primark and now safely put away for said holiday (I am planning big time already). I simply added a layer of Ranger Glossy Accents to make Mickey "pop" and look less of a tag. The tag hole was carefully covered over with a star. 
I used a red paper with a tiny white polka dots from an origami stack from The Works. The small glittered, self adhesive letters came from Hobbycraft (£1 per pack) 

The words are mat and layered on white and then silver card.  The main polka dot panel is also mat and layered on silver card.  I have then added a little faux stitching and clusters of three dots using a black fine liner pen to draw the whole design together.  

I am so excited about next year I might just pop ............ 

Thursday 15 August 2019

Badge Making With Bertie

Bertie isn't a really crafter, he is far more interested in machines and how they work, particularly Henry Hoovers and blenders, in fact when he is drawing, he is watching the interaction of the pen with the paper rather than what he is actually drawing,  which is something to behold.
His Grandy-Andy would have just adored him. I can see them now in the garage together doing pipes and tools and stuff, with Andy gently explaining everything to him and then letting him have a go himself  .......... 
.......... and it's weird his obsession with plumbing and pipes which has come from nowhere,  someone is guiding him I am sure, but I digress .......

That said, when Bertie suddenly announces that he wants to make badges for all the ladies at nursery  I know he means business, as he rarely initiates any sort of creative activity .
Even when the Badge-It got temperamental and produced one or two mangled badges, Bertie would sigh, chuckle and then we'd start all over again. 

He was so focused, we made seven badges in all, and never once did he flag or looked as if he'd had enough.  As he started each badge he named the person it was for so I could write the label for it's bag.
I tell you that afternoon I had to wipe away quite a few surreptitious tears.
Sadly I only took one picture of one of the badges, to be honest I was far more engrossed trying to capture this precious little boys kind, gentle and curious nature and our very special time together.

Wednesday 14 August 2019

Iris's Mini Christmas Plaques

My apologies, I know, I know ...... it's far too early for little ones to be thinking about Christmas, but these are the little plaques Iris made a couple of weeks ago using mini wooden frames from Poundlands craft section ......
........ and some of the snowmen embellishments I found in Michaels in New York a year or so ago.  My own Christmas projects are gathering pace, but I really didn't want to encourage Iris to become embroiled in the festive season so early on in the year. However, during her visit she just happened to stumble upon a wonderful drawer of treasure. For her it was just about wanting to create something using some of it and absolutley nothing to do with the time of year.  So,what's a nan to do, say you've got to wait until November/December before you can use all those lovely tempting bits and pieces? 
I have to admit to being a little reticent when her little eyes settled upon the snowmen, but then I thought, what the heck, what's the point in squirrelling them away, when they were meant to be used, especially as I cleared the shelf in Michaels of all they had anyway, so I had more than enough for my own use as well.
I just love the innocence of everything she has created and it's also given me a few ideas for card designs and a few Christmas tree decorations of my own.

Tuesday 13 August 2019

Guest Crafter - My Daughter Lucy

As you know Lu and I love a Greek holidays and a Greek church.  I have Greek icons in various forms all round my flat but  then Lu decided to take one step further and ordered this beautiful cross stitch to work on.
It didn't take her long, despite all the fiddly diddly gold thread, which she said was an absolute nightmare as gold thread tends to knot very easily, but the results are stunning.  There are even little jewels to make it pop even more.  I know for one Marc will absolutley love it too.

As you know I loathe sewing with a passion, any attempt I make always results in an acute bout of itchy gums.  The detail of the face, well what can I say. I admit to having a very severe dose of icon envy.
It also gives us a mission when we go out on one of our mooching trips as Lu now needs to find a frame for it.  Me? I think I would go for something secondhand, in brown wood and quite heavy, like the icons we see in the Churches we visit, but Lu wants to go all white.  We shall see ...... and I will report back to you when we have lift off!

And just to make you smile ..........


Monday 12 August 2019

Tiny Framed Snowman Tree Decoration

This was one of those ideas that got me out of bed at stupid o'clock to see if it's do-able.
I love the packs of snowmen I got from Michaels in New York a year or so ago and really wanted to use then, but they are quite small and can easily get lost on a project, but then as I lay in bed one night I wondered if they would fit in some equally small plastic frames I got China a while ago ........ I couldn't wait until the morning, so at some unseemly hour I could be found going through my craft drawers to find the bits.  As I hoped the snowman and frame were just the right proportions for a perfect marriage.
In the morning I set about gathering suitable materials together.
I started by cutting a small rectangle of card to act as the backing, getting it to the right size was a fiddle as I had to take the irregular outside into consideration.
I covered the front of the card with a blue paper sky and layered white glitter card snow.
....... and glued it to the back of  the frame.  I then added the snowman and on a whim filled the frame with Ranger Glossy Accents 
When the Accents were set I decided to add two snowflakes to the corners of the frame using a E6000 as the bond to keep them in place to be strong. I also used a tiny eye screw from which the frame could be hung. This was a bit of a fiddle using my model makers drill, but I got there in the end.

The final touch was to add a sentiment on the back, so if the frame twizzled on the tree, there would be something to see on both sides.  This was handwritten using a black fine liner pen.  Looking at the pictures now I think I will add three small, clear flat backed gems too, for extra bling and "magic"

I am also wondering I could also turn these frames into brooches if I used a laminated backing?????

Anyway, I think I will be making quite a few of these little things, possibly to give the staff at Bertie's nursery school as fairing gifts.