Wednesday, 6 December 2017

Blast From The Past Elizabeth Shaw Mint Robin From Christmas 2011

Oh my life, what possessed me?  This is definitely too much fiddle fart for just one Elizabeth Shaw mint crisp!!!!!!
andys nokia 052
I thought that I had flogged the whole chocolate mint thing to death, but then I got to thinking about robins  after finding this robin embellishment below  that I bought last year and as I had a few mints leftover from something else, one thing led to another!
andys nokia 067
Using the robin as a sort of template, I used my 1 3/4”  Stampin’Up circle punch for the bodies, made with brown card and the breasts with red glitter paper (which I then re shaped), then I cut a section from circles made with my 1” punch  for the tails, (also in brown card). 
Mint Crisp Robin
But my main problem was that my feeble brain just couldn’t, after making the first side of the robin, fathom out how to put together the reverse one (? what a numpty)  …. and I am ashamed to say I had to have several attempts at getting both sides to match up, the poor robin’s tail ended up in some very strange places before I was happy!
andys nokia 048
Eventually I managed to match both sides up, including googly eyes and then thought about adding a pair of dangly legs, using brown thonging and two beads.  I have to admit it looked very cute! 
andys nokia 051 
The final stage was to add a thread to hang him up by and sandwich a mint between the two sides, but as I said when I first started …. far too much fiddle fart for one blooming mint!!!
Elizabeth Shaw Mint RobinElizabeth Shaw Mint Robon decoration

Tuesday, 5 December 2017

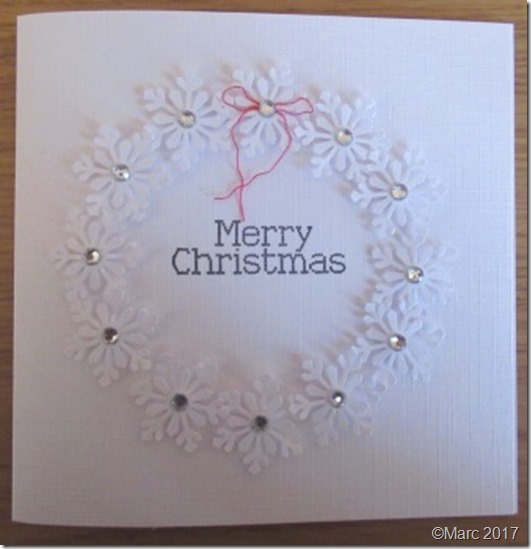
My First Christmas Card Of 2017 ……… From Marc

This has got to be my most favourite card from Marc ever …………. it’s just perfect …… all boxed and tissue papered, very Marc xxxxxx
IMG_5928
The sentiment was stamped ……. I love the delicate font, perfect with the snowflakes …….. I think I may have to borrow it sometime next year.
IMG_5929
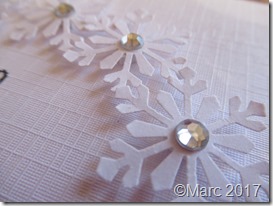
The snowflakes were made using a  Martha Stewart Himalayan Snowflake punch, now sadly discontinued or else I would have been straight online to order my own, so another borrow I think!  The snowflakes are mounted on tiny foam pads to lift them up.
IMG_5931IMG_5936
Marc said that it was the bow that drove him mad as it was so fine, but so worth all the fiddle fart, cross eyes and cussing!
IMG_5932
I love it ……. and it will be treasured for many Christmas’s to come.

Monday, 4 December 2017

It’s That Time Of Year Again ............

I have to admit that I have been really mithering about my lack of crafting over the past four months (too many weekends away and having fun), which has led to a sad lack of posts for this December,  but then Marc had the brilliant idea of reposting projects of Christmas's past, ideas that could still be repeated and/or revised accordingly for this year and the future, as well as being  a bit of a blast from the past from the days when I first started blogging ………. so, that’s what I am going to do ...... posting every few days for this month at least, interspersed with a bits and pieces from this year on  most probably on a Monday and Tuesday  …………
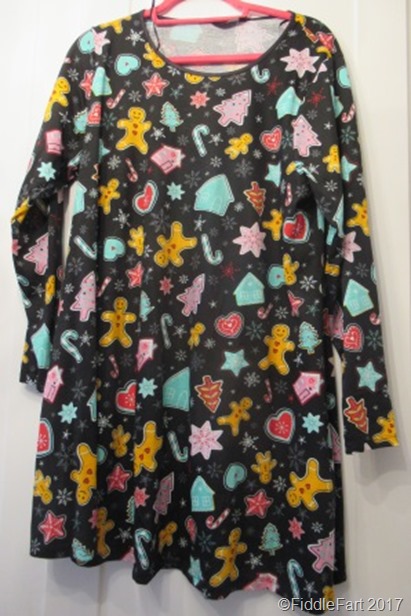
So today ……..  I bring you …… my 2017 festive wardrobe ……..
IMG_5600
I have done Christmas jumpers to death, although I am not really a “jumper person”, as a woman of a certain age they do tend to make me rather hot after a while, however I do wear a lot of swing tops, so imagine how chuffed I was to see festive ones start appearing in the shops and online this year, as they are just perfect. The one above, for which I really splashed out is my “best” top from Yours https://www.yoursclothing.co.uk/black-multi-christmas-gingerbread-man-print-novelty-longline-top-p …… and will be worn on the big day itself and on “occasions”!
IMG_5599
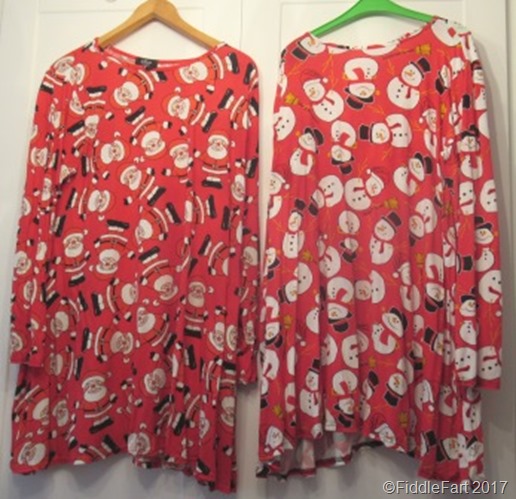
The other three are to wear on my Iris and Bertie days, found on eBay for silly money. The red and blue snowmen ones were just £4.95 each plus £1.99 p & p
IMG_5949
…… and the Santa one was £3.50 plus £2.99 p & p. Well, they were no brainers, it would have been rude not to make a few considered purchases and at least I don’t have to worry about what to wear every day in December!!!

Monday, 27 November 2017

Button Flower Tags

I am not sure about these tags at all, hence the reason why they have just lingered in my “done nothing with” box on my desk for a bit too long.
IMG_5454
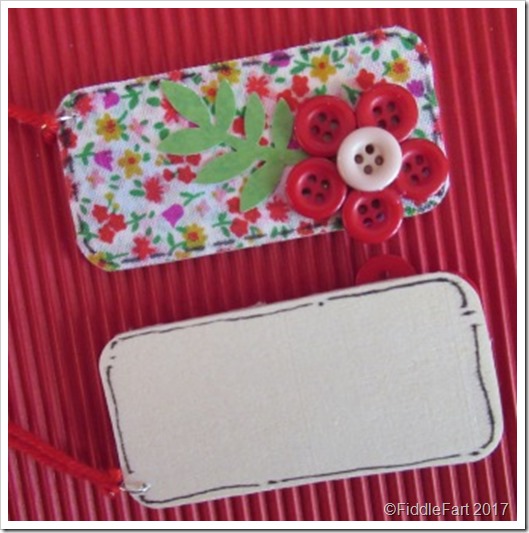
The tag base is a thinner than usual, wooden children’s domino which I have covered with a scrap of self adhesive, floral, cotton material from The Works.  I then drilled a hole in the corner for a jump ring and tie attachment.
IMG_5456
The small buttons also came from The Works, the flower left over from a previous project. I then simply added a punched foliage spray and a little doodled faux stitching round the edges.
IMG_5455
The back was similarly edged, leaving plenty of space for a message/greeting etc. 
At the moment the tags don’t really work for me, I can’t put my finger on “what’s missing/wrong” though, perhaps a discreet scattering of small, flat backed gems in the centre of the printed flowers, a gem in the middle of the centre button, or some matching coloured beads on the tying thread????  I guess they will probably stay on my desk for a little while longer until I can work it out, or perhaps they will just come into their own when put on a parcel wrapped in a matching plain paper?????

Monday, 20 November 2017

Guest Crafter – “Auntie Beth”

IMG_4924IMG_4925
I recently spent a long weekend in Bude, staying with my “Auntie Beth”. 
IMG_4928IMG_4930
Her house is a five minutes walk from the beach, and full of her seasidey craft creations that I thought I would share with you.
IMG_4929
Beth has experimented with a few embellished, jewelled mirrors and picture frames, some of which I have featured in the past.
IMG_4926IMG_4927
And while I was there she was also experimenting with decorated pebbles, decoupaging them with scraps from her completed colouring book pages and then varnishing over them.
beth stone
I understand that Hide and Seek Painted Rocks is the latest world wide craze that’s now hit the UK, in fact  I spotted a ladybird painted pebble that had been left on the beach while I was there. http://metro.co.uk/2017/08/29/move-over-fidget-spinners-the-latest-craze-is-painting-rocks-6886535
IMG_4932
The charity shops of Bude also yielded their treasures, Beth found this real porthole in one of them, it was ***** heavy but perfect for her seaside abode. I am not sure what she paid, but it was a real find, but I could see Marc taking real a fancy to it!!!!
frozen dress
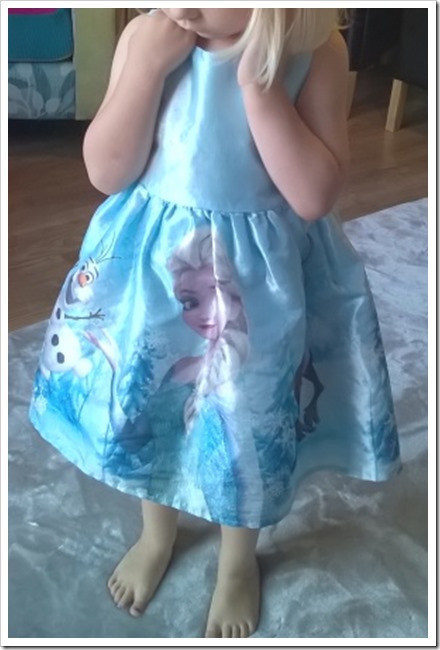
My “find” was not quite so dramatic, a H & M Frozen dress for just £2  which made a certain little madam a very happy bunny!

Monday, 13 November 2017

Simple Lettered Thank You Card

This card measures 5.5ins x 5.5ins and is made using a hand cut white linen effect card.
IMG_5087
The adhesive chipboard and domed letters came from packs of alphabet stickers from B M Bargains and Home Bargains (69p - £1.49)
I started by placing the A in “Thank” roughly in the centre of the card, adding the other letters on either side afterwards.  I also aligned the “O” on the row below with the “A” and repeated the exercise. By placing the letters in a higgledy piggledy fashion it looks less formal and saves having to try to make sure all the letters are level and equally spaced apart.
IMG_5089
The design is brought together with groups of three doodled dots using a black fine liner pen and red flat backed gems. A quick card taking no more than 15 minutes to put together.

.

Monday, 6 November 2017

Save The Date Wedding Cards

As I have said, of late I have not been doing a great deal crafting due of other commitments, particularly at weekends, and it has to be said that this looks set to continue until the New Year at least, however, there has been one exception as my nephew and his fiancée have asked if I would make their Save The Date Cards for their wedding in September 2018.
SomethingTurquoise-DIY-Instagram-Save-the-Date-3-_00141
I have to admit to being a little nervous about doing this as I know their standards and expectations will be high, however when Amanda sent me this picture (above – click for link) of what she had in mind, I relaxed just a touch as the basic idea appeared to be relatively simple and that I could leave them to source, create and then add the sticker pictures themselves when the cards had been made.
I went on the site and found that templates for 2017, 2018 and 2019 are all available - http://somethingturquoise.com/2015/01/16/diy-instagram-save-the-dates-3/, however, knowing Joe and Amanda I wanted to be able to offer the option of being able to make whatever changes to the original design they may have in mind to suit their own wedding theme, be it the card size, wording, font, font colour etc. so I made my own template based on the original idea using my ancient but precious edition of Publisher 2003.
Picture1
I was chuffed when I was able to download a free font that was as near to the original as I could muster from https://profont.net/fonts/tradition-sans-xlight-font-download.html
There was then a lot of fiddle farting on my part in an effort to get everything evenly spaced and centred especially on the calendar section, but I reckon after about two hours I had come up with something I could quite easily alter to suit Joe and Amanda.
IMG_5540
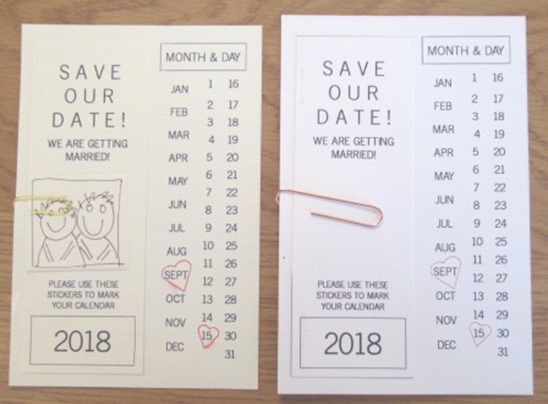
I then printed and cut the two sections out putting them together in a variety of different ways ……….
IMG_5541
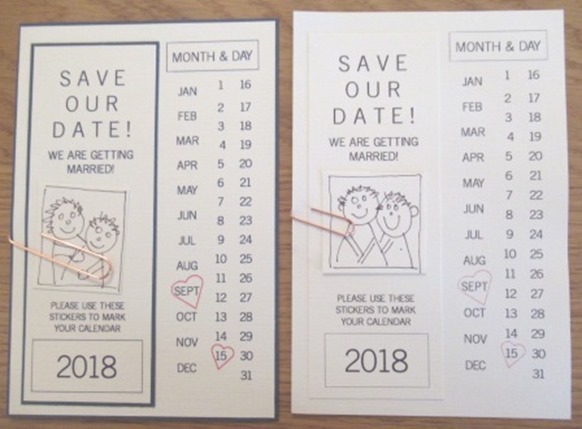
…….. I couldn’t help  a few mat and layering ideas on grey, navy and gold mirror on the Save Our Date section and as a backing to the whole card, which should fit a 7” x 5” envelope, but you will notice, NO faux stitching!!!
IMG_5542
I  also varied the text colour and thickness of the text boxes and hearts, on a choice of white or ivory linen effect card, although, in the end, I think they will go, more or less with the idea they first sent me ……
IMG_5543
Amanda had mentioned rose gold coloured paperclips, which I did purchase to try, but I have to admit I am not too sure about the colour against the ivory card, however before I can do anything else I need to wait for Amanda and Joe to come back to me, as far I know at the moment it’s between two of the above. Once I have had the say so, I will then make up the shortlisted ideas again but much more “professionally” and then perhaps do a little more research on other paperclip colours and designs available …… I have seen some arrows that could look good and I am thinking that metallic turquoise could also look stylish, but I need to be mindful of keeping costs down!  Anyway, as soon I as I have reached the next stage of approval and then production I will be sure to let you know.

Monday, 30 October 2017

Experimenting With Martha Stewart Molds

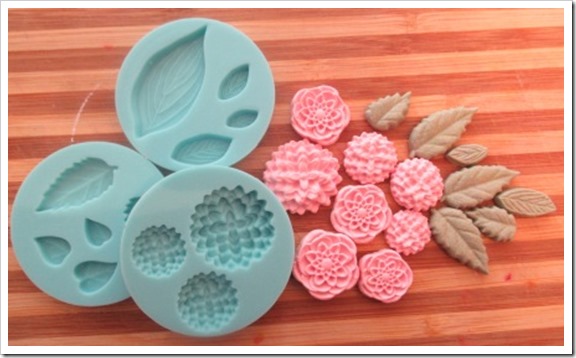
While I was in Swindon with Di and Mrs A on our first meet up a little while back, Di gave me a very generous collection of Martha Stewart flora and fauna molds.  I was thrilled as I had seen them before and was sorely tempted but held back!
IMG_4709
….. And well,  after receiving such a lovely gift it would have been rude not to experiment with them.
IMG_4708I decided to have a go at making a couple of tags, using air drying clay and cookie cutters to cut out the main tag part.
IMG_4706 I coloured the white clay with a tiny amount of green and pink paper clay, which although I was a little  tentative, worked perfectly for colouring the moulded embellishment pieces.
IMG_5449IMG_5450
The flowers and leaves were stuck easily to the tags with a little water, forming a very secure bond. I added a little edging using a cocktail stick just to finish things off and also to make a hole for a tie. All that was left to do was allow the tags to dry completely, which due to their thickness took quite a while.
IMG_5451
Once dry, I simply added a thread tie.  I was going to add a wooden bead but on this occasion I didn’t think the wood of the bead and the clay made a good marriage, sometimes I don’t like mixing too different a type  of material on an idea …… 
IMG_5452IMG_5453
…… however if I were to repeat this or a similar project I think I would probably make a few extra clay beads for that purpose, just in case.

Monday, 23 October 2017

Guest Crafter–Little Miss Iris And The Family Christmas Card for 2017

Young Miss Iris is proving to be quite an artist, but then I am biased! She was only three in June but every day I can see her little skills and attention for detail blossom and her thirst to draw at the moment is insatiable, but it was this last picture, drawn on Saturday, that really blew me away ……..
IMG-20171021-WA0001
……. it’s Iris and Bertie opening their Christmas presents, and was drawn totally without any adult putting their four pennyworth in!
WP_20170922_10_54_26_Pro
I have asked if I can scan it so that the details are really clear and then I am going to have a set of photos printed (Aldi photo processing is brilliant and only 5p a print) to go on the front of a card blank, eh voila, a gorgeous and very personal family Christmas card. We might put a tiny bit of glitter on the tree baubles perhaps, but only with the Artistes say so!!!

Monday, 16 October 2017

A Simple Lettered Birthday Card

This card measures 5.5ins x 5.5ins and is made using a hand cut, white linen effect card blank.

Simple Random Letter Birthday Card

A very quick and simple Birthday card today made for my son Tom’s birthday.

IMG_5074

The self adhesive, chipboard letters came from B M Bargains and cost £1.49 a pack. I especially like the dotted letters as they lend themselves to being “encrusted” festively with clear flat back gems.  I am already planning on using them in the same way as above, but using Christmas words like Merry and Bright, Jingle, and Holly with accompanying small embellishments.

IMG_5078

But I digress …….I started by sticking the middle P in Happy on first, as centrally as I could and then added the other letters by working outwardly in a higgledy piggeldy line. I then did the same with T and H on the second line, aligning them roughly with the P above, if that makes sense,  this means that I don’t have to worry too much about getting everything perfectly level and evenly spaced.  Adding clusters of three doodled dots and clear star gems bring the design together. A quick card made in, I reckon, under 15 minutes.

Monday, 9 October 2017

Simple 30th Pearl Anniversary Card

This card measures 5.5ins x 5.5ins and is made using a hand cut, white linen effect card blank.
Pearl Anniversary Card  30 years
I wanted a really quick but effective card for my sister and brother–in–laws 30th Wedding Anniversary, they are not a fussy, over the top sort of couple, so I knew a plain and simple card would fit the bill perfectly.
IMG_4786
The wooden laser cut letters came from The Works (£4 a box) which I placed in a higgledy piggedly way because I am lazy and don’t really do precise, I find it a lot easier to have a casual approach when using letters and I think I got away with it.
The tiny flat back pearls bring the whole anniversary theme together. Simples!
.