The wooden embellishment on this card came from http://www.designsonpine.co.uk/, they have a lovely craft section and I have had a few bargains in their clearance sale. It’s worth having a look for something a bit special, especially if like me, you love pastel hearts and stars.
When I mess about trying to decide where to put the tiniest and most insignificant of flat back gem I call it Fiddle Farting, hence the name of the blog!!!
Friday, 25 September 2009
Thursday, 24 September 2009
Card Made Using Punches
I won a competition in Quick Cards Made Easy with a card very similar to this.
The background squares are hand drawn and coloured using pastel Pro Marker pens. The shapes are made using a variety of paper punches, I like to double layer them for a 3D effect and fluff them up a bit (but these seem to have gone a bit flat!).
The tiny gem and sequin embellishments used to decorate the punchies are nail embellishments from Poundland, just the right size for very small work.
Wednesday, 23 September 2009
Queen Bee Card
Tuesday, 22 September 2009
My Daughters 25th Birthday Trip to London Album
Monday, 21 September 2009
It's Party Time!
These stickers were a bargain from Home Bargains, a little while ago, as a bogof. They worked out at £1.99 for two packs and I must have got 6+ cards from them.
The background paper was from a 12 x 12 scrapbook set I got from Ryman's, which matched perfectly in scale and colour.
Every time I have made a batch of these cards they have sold immediately.
Sunday, 20 September 2009
Another Wedding Card
Oooooooooooooops, the eagle eyes among you have probably spotted my error when making this card, I have missed out the "r" in "your" !!!!!
Fortunatley the error was spotted before the card was sent! Phew!!!!

This is a wedding card I make quite often as it is simple and unfussy.
I have also made this design up for a set of wedding invitations for a lovely couple last summer.
Fortunatley the error was spotted before the card was sent! Phew!!!!
This is a wedding card I make quite often as it is simple and unfussy.
I have also made this design up for a set of wedding invitations for a lovely couple last summer.
Saturday, 19 September 2009
Baby Tags
I love the idea of babies in pea pods!
These tags were made using the large Sizzix pea pod die. It does come with a babies head, but it seemed too small and out of proportion, so I have used another larger Sizzix head die instead and cut the body and hands out myself.
The writing is my own and the embellishments are from Assessorize. The background papers are from a baby scrapbook kit from The Works.
Friday, 18 September 2009
Altered Jigsaw Pieces
I am fascinated by altered art but it just doesn’t look right when I try it!
I don’t think I use the dark moody colours the experts seem to and I am scared when it comes to choosing the right stamps to get the effect I admire. All I know is I like stamps with text and crows (and goodness knows what that says about me!)
I love Tim Holtz and I drool over his DVDs. I was thrilled to get up close to him (and get the above shot) while he was demonstrating at the Birmingham NEC earlier this year. But this is uncharted crafting territory for me, and not one I think I will be able to truly master. Unless Tim ever gets to see this blog and decides to take me under his wing!!!
Anyway this is my sorry attempt at altering jigsaw pieces.
Thursday, 17 September 2009
Cards from Christmas Past
Here are a few of my Christmas cards from last year ……….
Everso simple….. topper made using wavy layers of white glitter card, Christmas tree brads and tiny silver stars on a on a long thin blue card blank.
I make all my own card blanks using my trusty Coppernob scoring board and always put a blank insert inside them.
Think these are “Dress Up” buttons from a huge bag I got from US EBay. The snow flakes are table confetti, sorry I can’t remember the name of the paper.
This pathetic little snowman is actually a china cake decoration I got from Penkridge Market (Staffs), think they were 30p each.
This is one of my favourite cards ever! The bulbs are from Crafts for Christmas. I threaded them one at a time onto crafting wire, winding the wire round a cotton bud about four times before adding the next bulb, then tucked the surplus wire behind the base card and finally mat and layered onto silver mirror card.
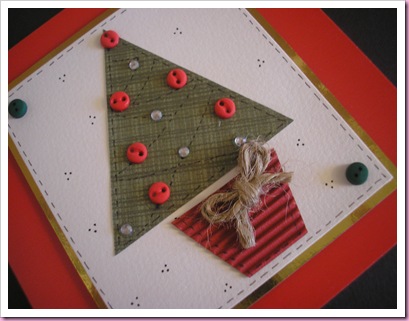
This card is a reject, as the tree is ever so slightly squiffy. This snowman card was a lot of fiddle fart…. with a lot of mat and layering and faux stitching. The snowman and star were from a big double pack of 3D stickers from Poundland. When I saw them I filled my basket, because if you don’t buy them when you see them, you never see them again!
My son works in Forensics and likes to give his friends a forensic themed card each year!
The H’s were cut out on my Cuttlebug (now traded in for a Big Shot), the fingerprints were taken from Google and glittered with translucent micro glitter …… and would you believe it someone in his office identified that the fingerprints were actually upside down!

Finally this is the picture I put on my cards, for my kids, as we are all quite Monkey mad! (If you haven’t already, have a look at my other blog by clicking on the monkey picture at the top of this page , it’s quite, quite mad!
Well that’s some of my cards from Christmas past!
Now all I have to do is make cards for Christmas present!
Wednesday, 16 September 2009
Christmas Pudding Badge/Embellishment
I love the christmas puddings on cards. This is an idea I am working on …….

It’s is made using my Bandai badge maker. I have used a brown paper under the plastic protective cover, added Anita’s 3Dimentional paint for custard/cream, used the tiny dots left over from a black peel off sheet for currants, table confetti holly leaves and small red gems for holly berries.
I was thinking that without the badge pin being attached it would make a cute topper on a card or on a cracker.
If you haven’t got a badge maker I am sure the idea could be adapted with different badge making kits/parts
Tuesday, 15 September 2009
An Early Christmas Card - Mistletoe
I don’t stamp very often and when I do I have to keep it very, very simple as I am so caggy handed.
I love using pearls on my cards and this small stamp from The English Stamp Company is perfect for doing just that.
I stamped the mistletoe onto a square of pale cream card and then carefully tore the edges to give a ragged effect.
I sewed round the edges, rather haphazardly, with gold thread, using one of those small battery operated hobby sewing machines. To finish the design I made another slightly larger square, sewing round it too. The two squares were then stuck together and added to a card blank.
Monday, 14 September 2009
Work in Progress ………………
This is a prototype of the card I am going to send each of the girls in the offices where I work!
But not with this rather glum models face ….. because I have managed take all the girls pictures, without them suspecting a thing!
It still needs a lot of fine tuning, but I thought I would share my first attempt with you.
After photographing it, I realised my first mistake was the flatness of the face, it should have a couple of sticky pads behind it, so that it stands proud of the body, or better still, I could make a springy device so that the head wobbles……… I also think I need to twiddle with the proportion of the head to the body (more fiddle fart).
The dress is an embellishment I bought ages ago, but I am pretty sure they are still available on e-bay. All I’ve done is add a few black adhesives gems
I think further improvements can be made by cutting the boots out in vinyl on my quickutz silhouette and adding fluff to the white band on the hat ….. and I’m not sure about the writing, but the basics are there.
When I have got it “right” I will post it again.
Saturday, 12 September 2009
Message in a Bauble.....

This is a simple idea I used a couple of Christmas's ago.
I got some clear, glass christmas baubles from Wilkinsons, (at the time they were about 33p each).
Then I found a quote that reflected what I wanted to say to my friends that Christmas:-
“A good friend is hard to find, hard to lose, and impossible to forget..."
I typed and printed the words on cream card in sepia, using a handwriting font.
The next step was to very carefully tear round the message to get a ragged, uneven edge and chalk rub the edge very lightly in brown for an aged effect. Finally I put it inside the bauble so that it could be read through the glass. A knitting needle comes in handy to position the message if you want to be precise!
The idea could be adapted in so many ways:
- A small child's drawing for Grandparent
- A photograph
- A feather, ribbon, leaf,
- Glitter - for fairy dust
- Punchies - hearts, stars ....
- Table/party confetti - translucent stars would look so pretty.
- Or what about punching or cutting out individual letters (on you Robbo) that make up words like LOVE .....
Friday, 11 September 2009
Wish Bracelet
This is a little bracelet I give to all the girls I work with, who do GCSE Food, before they go off to do their exams. One of them came bursting into my office yesterday and said “It worked, Miss, I got A*!”
I bought 100 “Wish” charms off e-bay, a while back. I was very very apprehensive, as the seller was in China, but they arrived safely and cost about £6 inc P & P, what a bargain! I have seen other people selling them at £2+ for just 5. All I did was attach a pink cotton thread.
The organza bag is so dinky, I think I found them on one of those rotary stands in a craft shop – something very similar to “Craft for Christmas” (their packets have a white label with a blue pattern, if that’s any help!).
You could use this idea for lots of different occasions with different charms (I like the Tibetan silver charms best, they do other words too, like love, hope and believe). What about a tiny wing for a child just going off to University or a star on a red thread for Christmas?
Wednesday, 9 September 2009
Trick or Treat
I got the idea for little sweetie bags from my friend Lisa http://craftfairy.blogspot.com/
She also introduced me to Spellbinder Nestabilities (and that cost me a fortune! Thank you Lisa!)
The label sets make the most fantastic tops for bags. All you have to do is score the middle of a cut label and fold in half for a perfect bag top to decorate to match whatever theme you are working on.
The ghost chocolates are from Marks and Sparks and the pumpkins from Poundworld. I have added Halloween confetti for extra sparkle.
Below is another bag I made for my niece when she was in hospital recently. I drew the bubbles in blue permanent pens to accentuate the fishy theme.
Tuesday, 8 September 2009
Can I Bribe You With Some Blog Candy?
I have had almost 1,000 visitors to my blog since I started it just over three weeks ago..... I am so excited! I would love to make that magic number in the next day or so ...... if you would like to help me get there, please leave a comment on this post and I will find some Christmas Blog Candy for one, randomly picked, commentor!
Something Old, Something New …. Wedding Gift For A Bride
First of all, please forgive me for these awful pictures.
I hope, despite the horrific nature of the photography you can make out what I have made.
This is a little book I have cobbled together several times now as a gift for a bride.
It measures 4 x 4 ins and was made using my bind-it-all. The cover is a silk covered card, (very lovely). The pages are cream card which I have faux stitched with a light brown, fine tipped pen.
On the left hand side of the book I have made pockets using a matching cream/gold embossed paper. I tell people who ask me to make this book, to put in small pictures and/or mementoes of the bride as she grew up, or little messages from the bridesmaids, etc. to make it extra special.
Each page is made up from the “old, new, borrowed rhyme. The “old” on the first page is made using old lace, a mother of pearl button, and old gold safety pin. The button and pin are methods of joining two things together, …. as the bride and groom will be on their wedding day.
The “new” page is made up of mini scrabble letters (Jolees)spelling the word “Life” to represent the new life the bride is about to embark on, and the heart shaped lock and key, symbolise security.“Borrowed” is a bit tongue in check ….. two credit card charms!
Forget-me-nots have been used to represent the “blue” and dragonflies are an ancient symbol of growing, changing and maturing.
…. and finally I have put an old polished sixpence on the last page.
I have tied cream ribbons to the binder of the book and a small heart shaped gold charm that says “Made with Love”.
Phew!
Monday, 7 September 2009
Sat Nav Card
Beep Beep! Men’s cards are hard! I would much rather work with pretty things like flowers, beautiful paper, ribbons etc.
The idea with this card started with the weeny car stickers which I bought from Mei Flower at the NEC Hobbycrafts Show.
I found a picture of a SAT NAV screen and added the text “Happy Birthday” then printed it twice. The topper is a very basic two layer “decoupage”, made by cutting out the image, including the SAT NAV frame and then just the SAT NAV screen. These are mat and layered on silver mirror card.
The background is part of a page from an old road map book, (a car boot sale bargain, bought for pence, which comes in very useful at times), which I’ve mat and layered on red.
Advent - Countdown to Christmas Chalkboard
I was still thinking about my Advent Chalkboard this morning, when I had one of those “eureka” moments, I suddenly remembered a wooden Christmas garland that I bought in a garden centre sale, for a couple of pounds, a little while ago.
It took a bit to find …. but the search was well worth it, as the snowmen on it are just perfect!
All I've had to do was take the garland apart. There were six snowmen in total, so I am chuffed. There were also about six santas on it too, but they are not quite so big and look out of proportion, but no doubt I will find a use for them too.I have attached some gingham ribbon to the string hanger and added the writing and snow with white Posca pen, adding a touch translucent micro glitter along the bottom. All I need now are a few wooden snowflakes here and there around the frame. I'll post another picture when the board is completed.
I hang my head in shame though, I can’t be the only one who has so much crafty stuff that I forget what I’ve got, can I?
Subscribe to:
Posts (Atom)
