This card was a bit of an experiment but it’s turned out pretty ok. The card measures 16cm x 12.5cm and is made using a ribbed effect kraft card. When I came to do the leaves I just couldn’t find a paper that went with green background, so in desperation and with a chance of ruining the card, I tried using Ranger Glossy Accents instead of paper and I am chuffed with the results.
When I mess about trying to decide where to put the tiniest and most insignificant of flat back gem I call it Fiddle Farting, hence the name of the blog!!!
Thursday, 21 July 2011
Wednesday, 20 July 2011
Cruise Birthday Card
This is a card I made for The PE Lady’s Mum (if you read my other blog Mum’s Monkey, you’ll know who I mean)
She was going on a cruise round the Canary islands for her 80th birthday and The PE Lady wanted a special card to include this.
I used my newspaper card template and this is what the sheet looked like after creating it in Publisher. As you will see, it didn’t include many elements and in the end I didn’t even use the sea picture, as it didn’t quite work, so I covered over it on the main card.
I’d used a few 3D stickers from this pack of transport stickers (sorry, I don’t know the brand or cost as I’ve had them for a long time) to give the card extra dimension.
I’ve added a bit of smoke, as I had rather a lot of space to fill in the sky and then a smattering of stars, also to fill in a few spaces. A card like this can take me quite some time to do, depending on the theme and if I am using stickers or a simple decoupage. I find the hardest part is fitting all the wording in so that it looks balanced.
Tuesday, 19 July 2011
Beach Hut Card
This card measures 8 ins x 5ins and is made using blue linen effect card.
….. and I do have such a thing about beach huts!
I’ve had these Paper Bliss stickers for a couple of years now and have never done anything with them, but it must be because it’s nearly holiday time that inspiration has finally struck……
….. and I do have such a thing about beach huts!
Honesty Is The Best Policy!
I cannot tell a lie …… and have been complemented after past reviews by people who have said that they trust my honesty ……
With that said, I’m always thrilled to be asked to write a review, so when I was asked if I would like to try out a serious bit of kit for my craft room I said yes straightway, especially as it was something I really needed, but as I accepted the offer I had a little niggle in my head.
Well, it arrived and as I unpacked it the Duke said straight away “That’s not right for you!” - seeing a potential problem with fixing it to my desk. But, once set up there was nothing really wrong with it .…. it was me, despite working with it for several days, I just didn’t like it, it didn’t give me what I expected, and being very expensive and free didn’t hold any sway.
…. Then I started to worry … if I didn’t like it, there was no way I could write about it, so I looked at recent reviews and though other people raved about its attributes, they still didn’t make any difference to how I felt.
I was so disappointed! I wrote back to the lovely agent, who asked me what the problems were, and all I could say was that I just didn’t like it and therefore I didn’t feel I could recommend it on my blog. They were very gracious, I’m not sure if it’s ever happened before, and now I’m waiting for it to be collected and taken back …. But I have learnt a huge lesson … to think very carefully before accepting any offer and always be up front and say, before, anything is sent out that if I don’t like it I won’t review it ….. and trust that spooky Derek Acorah voice in my head a little bit more!
Monday, 18 July 2011
Handcrafted Prawn Net
The Duke has been fiddle farting, so I thought I would give him a guest spot today ……
He’s made this beautiful prawn net for our holidays, for when we go fishing. I don’t want to use it and get it all sandy, it’s too lovely.
The attention to detail is wonderful …. I’ll let you know if we catch anything in it when we eventually get to use it……
He’s made this beautiful prawn net for our holidays, for when we go fishing. I don’t want to use it and get it all sandy, it’s too lovely.
We saw a shabby chic version (for ornamental use only) in a shop a while ago and that got the Duke thinking …
The attention to detail is wonderful …. I’ll let you know if we catch anything in it when we eventually get to use it……
Sunday, 17 July 2011
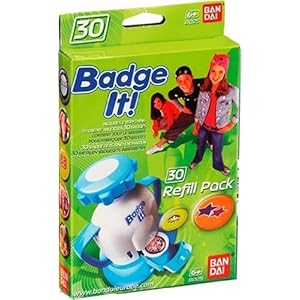
Badge It Makers For Sale ….
If you are looking for a Badge It, I’ve just had an e-mail from follower Sue who has a couple for sale at very reasonable prices, it might be worth e-mailing her: sue@suelough.plus.com
Bit Of Extra Information ….
I have to stress this is a toy, not a professional badge making machine, it works for me and the little funny things I like to make with it, I rave about it yes … but it’s only my opinion.
I’ve been doing a bit of mooching around and this appears to be the latest model of Bandai Badge It, available from quite a few outlets including Amazon or directly from Bandai
http://www.bandai.co.uk/product-details-page.aspx?CI_ID=32&Source=Google&gclid=COjH6Kfxh6oCFVQv3wodkBdVxw
I tend to get my refill kits direct from Bandi, they arrive within days and cost £9 for 30 – but Amazon has a good offer on at the moment which includes free delivery.
http://www.amazon.co.uk/Bandai-Badge-Sets-Refill-Pack/dp/B0007LPQYC
I have a pdf file of the badge inset below, if you would like a copy just e-mail me and I’ll send it to you.
I Love Tea Badges
Sorry, sorry, sorry, Blogger is playing up again leaving me with no pictures….. aghhhh… fingers crossed I’ve sorted it …….
My sister saw the badge (below) and really, really wanted it, but it was in a set of three and cost £10, which was a wee bit expensive. So I said I would have a go at making her something similar using my Bandai Badge Maker (I have two, one bought from e-bay for about £5 and the other from a carboot for 20p including a full set of badges because the lady didn’t want to take it back home with her!)
I myself prefer coffee, white with two sweeteners!!
Saturday, 16 July 2011
Oh My Life – It’s A Daft Old World!
Following on from yesterdays copyright debarkle ….. lovely follower Paula sent me this and it made me howl!
Cupcake Newspaper Style Card
Ok…………..after my little rant yesterday, it didn’t take me too long to tire of the pleasures of Mr Muscle, one squirt and a quick rub down and I was bored …. so its back to blogging I’m afraid, but thank you for all your kind words!
One of my newspaper cards today, using digi scrapbook designs for the cupcakes, which I have then embellished with a bit of micro glitter and Ranger Glossy Elements for extra dimension.
The cupcakes are made using very simple decoupage layers.
A few punched hearts here and there finish the design.
Friday, 15 July 2011
Going Off On One!!!
“I’ve so let the housework go since I started blogging!
Yesterday, I withdrew the post below (Poppy Bird-Seed Card) because it prompted a lovely but very worried follower to ask whether the young girl, who had drawn and given me the picture had any connections with a website selling digi stamp images. The writer felt that the picture I had used appeared to share several similarities to the images on sale and was perhaps not as original as it seemed. She was also concerned that because of these similarities I could be opening myself up for potential copyright issues.
My doodles !! My original work?? How do I prove it??
This made me think about copyright in card making and blogging. I checked out the website to which my attention had been drawn, only to find, in my opinion, that they were selling images that could infringe the copyrights of at least two major companies, (one from publishing and the other a film character). It's a minefield!
You’ve only got to look at the current trend amongst a lot of the top blogs on http://www.craftyblogs.co.uk/ to see the plethora of doe eyed, cutesy digi stamp images being used, many of which are comparable with each other, as well as to the drawing I used ….
So what do I do? Is the digi industry so circumspect that to use a child’s doodle/drawing on a card could result in possible litigation by questioning its originality? If that’s what the crafting world is all about who needs it? ….
There is more to doing house work than I anticipated!
Disillusioned, I am now considering giving it all up to start doing the housework again!!!!! Anyway I have decided to post the card regardless and be dammed ….. see you in court! ..... (files in cakes will be very acceptable if I am incarcerated!).
Popsy Bird-Seed Card
This card measures 7ins x 5ins and is made using a fine ribbed white card.
I just love the name! As soon as I saw her drawings I knew I could make some brilliant cards with them. So I asked it I could scan a couple to see what I could do.
I have kept it very simple, as I didn’t want to detract from the drawing. All I have done is a simple single decoupage layer on the hair and “Thanks” sign, sticking them down with a couple of small foam pads. I’ve also added Ranger Glossy Accents to the hair, shoes and flowers for dimension, plus a touch of glitter on her wings and tiny gems on the flowers for a bit of bling. …. and how cute is this little bird ….?
Thursday, 14 July 2011
Friends Forever
The background on this card is an old card gone wrong, which I’d kept as I knew I might be able to do something with it eventually.
The stickers are from Paperchase (£1 per pack), I loved the girls heads, and knew exactly how I’d use them, BUT why do they have to put faces on most the of the other stickers? Ugh …. I know I just won’t use them.
I’ve used scraps of card for the girls dresses and then doodled the other bits … I wished they’d do a packet of just faces….. I could do so much with them!
Wednesday, 13 July 2011
Poppy Card
I can’t believe how long this card took me to make. I love the paper and the embellishments (poppies are one of my favourite flowers along with sunflowers) but coming up with a design was a nightmare, everything looked PANTS. I wanted to come out of my comfort zone and try a mix of papers, but I’m so rubbish at it.
The paper and embellishments are from K & Co by Tim Coffey and are beautiful, but in the end, after at least an hour and a half I went for “simple” and just added three brass dragonflies to add a bit of bling and texture.
It’s so hard, I wish I could mix and match my papers and embellishments like other bloggers do, perhaps I should find a template and design I like and work from there, making small changes with each card I make, till I finally “get it”
Tuesday, 12 July 2011
Little Patchwork Cakes Card
Monday, 11 July 2011
Bind It All – Old, New, Borrowed and Blue Mini Book
The covers of these mini books measure 4.1 x 4.1 inches and the inside pages, made with ivory linen effect card measure 4 x 4 ins.
I featured my wedding mini books when I first started blogging but as they are all a little bit different I thought I would show you my latest ones.
This weekend I have had two to make, this one is destined for Ghana, where an old colleague went to work last year, met the “one” and is now getting married and settling down there for a while. Being so far from home, I thought it was important that she had something very traditional for her wedding day.
I’ve used Papyrus font size 18 for the text in a sepia colour.And added little charms and bits and pieces to embellish the each page…..
….. as well as punched flowers, tiny flat backed gems and faux stitching.I didn’t have two sets of ring charms ….
So in the second book I put a LOVE charm instead
On the right hand pages of the book I have added a little pocket for the bride to put little mementoes like small photos, confetti etc.
I don’t have any real silver sixpences, but I do have a pile of old ones bought from a coin shop in Wolverhampton which polish up a treat to put in the tiny organza bag on this page.
I leave the last page blank for messages to be written. It’s a real labour of love, I guess from beginning to end each book has taken me about three and a half hours to make, including the box.
Subscribe to:
Posts (Atom)