Thursday, 7 July 2011

Heart Shaped Keyring

I made this keyring for my friend Sarah
Kath Kidston Keyring
Packs of heart or oblong  shaped keyrings are available from Hobbycraft in the “Make It!” Create and Play range and are currently on a 3 for 2 offer – there are 12 in a pack which should cost £2.99, so I stocked up with Christmas in mind.
Kath Kidston Keyring 2
The paper I have used was from a page in the Cath Kidston magazine, too good to waste!  All I have done is cut out two hearts using one of the paper blanks (also included in the pack) as a template, stuck them back to back and then added a bit of faux stitching and a few tiny gems.  The adhesive letters are from the Tatty Teddy You to Me range.

Wednesday, 6 July 2011

Display Box For Cards

Card display Box
When I take my cards into work it’s nice to display them in a pretty box to entice people to look!
Clementine Satsuma Box
I’ve had this small satsuma/orange box for ages and wondered what it would look like if I tarted up a bit.
Card Box
So first,  I painted  the inside and corners using a cream Matchpot that  I’ve had for ages (think they cost me 10p for 3 from a recycling depot) and then lined the bottom of the box with a matching piece of cream card.  The sides are covered using a paper from My Mind’s Eye called  Mary Mary “Beautiful” So Cute Paper …. I’m quite pleased with how its turned out and it’ll serve it’s purpose for a while.

Tuesday, 5 July 2011

My 15 Minutes of Fame Care Of Docrafts Creativity Magazine!

Docrafts Card
This is a card I made using the free stickers with this months issue of Docrafts Creativity.  It measures 10.5cm x 14.5cms and is made using white linen effect card.
Picture 175
How awful am I? I dragged the poor Duke of Fiddle Fart off to try to find a copy of July/August Docrafts Creativity because my Royal Wedding card was in it! I was sure that the first place we went to would have it …… but no …. their most up to date copy was from March!
Docrafts Creativity magazine
So I made him drive all the way back into Wolverhampton to Hobbycraft where they had a copy……
Picture 171
And there it was on page 46, my 15 minutes of fame!Picture 173
Anyway the whole magazine is a really cracking read, so much so that it is sat on my craftroom desk for me to refer to as there are quite a few ideas I dying to try.
Picture 169
…. like these Papermania Four Door Cards and envelopes in either white or Kraft for £3, how brilliant do they look?
Picture 167
….. and what is more the stamps used in the 4 Door Cards are free with the September issue …. and boy do I need those stamps (as a non stamper!!).  I love the fact that it may only be July but the Christmas ideas are beginning to appear in the magazines and I am determined to get most of my cards etc. done in the school summer holidays. Bring it on!

Sunday, 3 July 2011

Tatty Teddy Birthday Card

This card measures 14.5 x 14.5 cms and is made using ivory linen effect card.
Tatty Teddy Card 1
This card is made using Tatty Teddy “You To Me” 12 x 12 papers with toppers that I got as part of my Royal Wedding card competition prize. I’ll admit I’m not very good with kits … they never seem like I have made them or look natural, if you know what I mean!
Tatty teddy Birthday Card
The pack came with a sheet of Tatty Teddy toppers and if I were to be ultra picky I have to say that the colours weren’t as perfect match as I would have liked, I think it may have something to do with the toppers being printed on a glossy card, and to be honest the difference jarred a little with me. This has happened several times before with paper and embellishment ranges, so I tend to buy the  embellishments and use papers I already have with them.   To add a little dimension I have put Rangers Glossy Accents on the bear’s nose, foot pads, parcel tag and balloons.

Saturday, 2 July 2011

Card For A Census Collector!

This card is A5 in size and is made using white linen effect card.
Census 2011
I made this card for my sister,  who was a census collector a few months back , to give to her supervisor when she had finished the job..
Census Collector
It’s not easy when you try to convey humour that you were not really party too, but I think I “nailed” it on this card, as my sister was very pleased with it!

Friday, 1 July 2011

Pendant Tray Project

Picture 001
I am so loving making these pendants, for this one I’ve used a copper pendant tray measuring 1in x 1in. It was so hard to take a picture that did the colours justice, the light in my craftroom is sooooo pants!
Picture 003
I’ve stamped the background using a text stamp and then coloured it with  blue and green Plaid blending chalk, with a touch of Stampin’Up Dazzling Diamonds glitter. The colour turned out to be really vibrant.  The two small dragonflies were put in the bottom of the tray, with the larger one balanced on the side.  When everything was ready I filled the tray with Anita’s 3D clear gloss finish, which took about  24 hours to set properly. Dead chuffed!

Thursday, 30 June 2011

Three Post Thursday …….!!! Plus Last Call for Winners of Crease Mouse/Mice

I have 2 Coppernob Crease Mice still unclaimed ..... BonJen and Jules can you e-mail me and I'll see you get yours xxxx

Post 1 - A Card From Exotic Climes

Picture 199
How exciting …..I had to send one of the Crease Mouses/Mice Josie from Coppernob sent me for my first ever blog candy all the way to Minneapolis, which was thrilling for me to think that I have followers in the US, and then I was even more thrilled when I received a Thank You card from the winner Cheryl.
Picture 198

Cheryl had not only used the Crease Mouse to score her card, but had also used it for to make the star pattern on the front of it ….. now that’s something I hadn’t thought of!http://www.coppernobcardcraft.co.uk/productDetail.php?product_id=16.  Thank you Cheryl x

Post 2 – A Gift of A Very Tiny And Exquisite Type Nature …

Picture 292
…. as if that wasn’t enough excitement, another lovely follower, Kathryn, sent me a very mysterious e-mail saying that she had seen and bought something that had made her think of me ….. (I thought, perhaps, a family packet of Maltesers or a bag of scratchings!).
Picture 293
….. and then a couple of days later this beautiful card with a lovely note followed……
Picture 294
along with …………..
Picture 295
…. this exquisite handmade, felted and spun inchie, I just adore it! 
Framed Woven Inchie
….. and how very spooky …. I had just the right shadowbox picture frame just waiting for it, it’s so perfect and is now on my treasure shelf in my craft room.  Thank you SO much Kathryn …it’s so beautiful and it has found a home where it will be appreciated and loved every single day xxx.

Post 3 – My Decopatch Disaster

Picture 296
With all this news of a lovely type nature  I thought that I would be able to bury my big disaster amongst it all so that no one would notice ….. but I’ve decided to come clean and show you that I have cocked up good and proper!
Picture
I found this tin at a carboot sale … the cards inside were no use, but it was the tin box I really had my beady eye on … I paid my 50p and was well chuffed.
Picture 298
….. and so over the past two nights I have lovingly covered it with Decopatch papers and several coats of varnish all of which was very relaxing and therapeutic …. until I came to photograph it and closed it ….….. only to find that all those layers of paper and varnish around the rim of the box had rendered it impossible to open again!!! Serves me sooooo right, I was so pleased with myself yesterday with my evening bag, I was heading for a fall!  DOH!

I have just read Marc's comment .... what am I like? .... I have rescued the case from the bin ....(with funny looks from my neighbour) and it is now soaking in the sink, paper and varnish peeling off as we speak, so that I am ready too start again.  This time I am going to give it a quick spray of paint first, especially round the top so I won't need to cover the tin right up to the edge.  Thank you Marc!

Also in answer Anj's question yesterday ... I have used both PVA and Decoptach glue on a couple of projects now and the Decopatch is definitely superior, with a far better finish (but, I have used ordinary clear varnish to complete my projects).  I have just bough a 160g bottle of Decopatch glue from e-bay as it was the cheapest place I could find it, including postage.

Wednesday, 29 June 2011

Decopatch Evening Bag

Decopatch evening bag
I blogged this bag ages ago, it cost me 20p at a local car boot/market. 
Picture 282
I have seen quite a few others the same since and it seems it was a free gift from Boots with some beauty products. It has languished in my cupboard until last Sunday after a visit to see my son who lives in Witney, where there is a rather lovely shop, The Pottery Place, that sells Decopatch stuff and it would have been rude not to go in and purchase a few choice items!
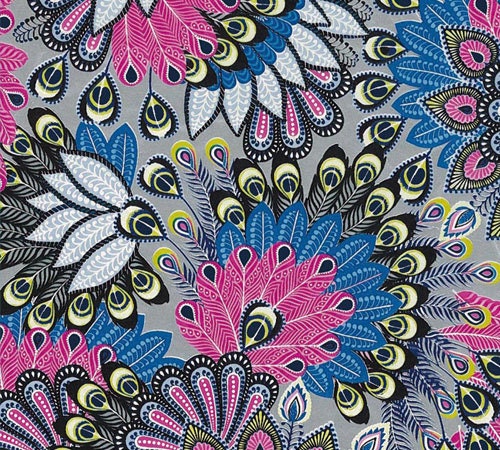
As soon as I saw this paper - Peacock Feathers Print (538), cost £1, I knew it would be perfect for the bag.
Picture 286
All I did was cut the paper into small stamp sized pieces, add a layer of decopatch glue to the surface of the bag and stick the paper down bit by bit.  When the bag was covered I applied another coat of Decopatch glue and left it to dry.   Once the glue had dried I applied several coats of clear varnish.
Picture 287
The bag strap was gold, however the paper had silver elements, so  I decided to go over it with several times with a black permanent marker.  I love it, it looks so classy now, I just need to go somewhere posh to use it!
Decopatch Evening Bag 1

Sunday, 26 June 2011

Patchwork Card

This card measures 5ins x 5ins and is made using white linen effect card.
Patchwork Birthday Card
Am I allowed to say “I love this card”? It’s very less is more , and very me!.  Each square measures 1.25ins x 1.25ins using scraps from  My Mind’s Eye, Stella and Rose, ‘Gertie’, 6in x 6in stack, which have to be my favourite papers ever, and all I have done is add some faux stitching round each one. The sentiment is from docrafts Tulip (Andrea Jayne) collection.
Stella and Rose patchwork Card

Saturday, 25 June 2011

Doodled Patchwork Card

This card measures 5ins x 5ins and is made using white linen effect card!
 Doodled Patchwork Card
I doodled this card, so I think I can safely say ……..
Doodled Patchwork Card 1
It’s all my own work …. though I did use a 12 x 12 paper as inspiration.

Friday, 24 June 2011

Followers

sad

I am not sure what’s going on with blogger, but I haven’t been able to see my Followers gadget for a month now, I believe some people can, while others like me can’t which means that people can’t become Followers ….. I’m not the only one and there are a lot of people in the same boat but it is frustrating, it’s taken two years and a lot of hard work to build up my little group!  I am e-mailing Blogger but as yet don’t have a solution!  I’d be interested if anyone else has the same problem.

Tattered Florals Thank You Card

Flower Thank You Card
The idea for this card was inspired by a card in the new mini Stampin Up catalogue (below).
Stampin Up Catalogue
I’ve used a DCWV patterned paper on the front.  The flower is made using my Tim Holtz Tattered Florals die and a heavy sprinkling of glitter. The centre of the flower is part of a Primark necklace that I have taken apart for the bits.

Thursday, 23 June 2011

A Little Bird Told Me …… Card

This card measures 13cm x 13cm and is made used a white linen effect card.
Picture 708
The owl stickers used on this card are from Paperchase and cost £1 a pack.   I’ve cut a square from a sheet of a A4 stripy glitter card and then sat the owls on the lines.  To fill in the gaps I’ve added a few very tiny daisies made using a punch from Hobbycraft and stuck clear flat backed gems in the middle of them. The centre panel is matted on silver mirror card.

Wednesday, 22 June 2011

Little Mermaid Cards

Three cards today all measuring 5ins by 5ins and made using white linen effect card.
Mermaid Card 2
I am sure I was a mermaid in another life or if I wasn’t I will be in the next!  These cards are made using hard plastic bubble stickers from Poundworld.
Poundworld Stickers
From one pack I have made  three cards, with a few stickers left over, which is a good return for my money.
Mermaid Card 1
The blue background doesn’t show up very well in the pictures, it’s a glitter card that looks like the sky but which works equally well as the sea. However it is a “bum” to glue anything to …….
Mermaid Card 3
….. so I have used Ranger Glossy Accents to add some extra gumption to the stickers, which has worked very successfully.  The final touches are made using either clear flat backed gems, or sequins with a gem centre.

Tuesday, 21 June 2011

Mouse Card

This card measures 7ins x 5ins and is made using white linen effect card.
Hmmmmm, not sure about this, I saw a printed version, and thought it would be easy to translate into a bit of paper piecing with googly eyes, but I think it needs a bit more fine tuning ……
Mouse Card
The mouse looks terribly sad for one …. the parts are rather crudely cut out as this was my first attempt ….. You can’t tell by the photo but, the nose is all shiny as I’ve used glossy accents on it  and I’m not to sure about the positioning of the ears ……. as I said at the beginning,  hmmmmmmm!

Monday, 20 June 2011

Scary Skull – Halloween Hairclip?

Halloween trick or Treat Hair Decoration
Why do I have a such a thing about skulls lately? However, at least I have recognised I do, and have learnt to live with it!
Halloween Hairclip love hair hair clips
My lovely, lovely follower Carly sent me a huge box of stuff a little while ago and in the week I went delving in it and hidden away in a folder was a pack of these puffy sticker skulls, to be honest I’ve seen them in the shops and have not been that inspired, but something twigged in my brain … at first I thought of making a brooch/pin, but as I got more and more carried away I could see that they were too wide and would probably not sit straight … BUT after a my weekly trawl through Wolverhampton's finest poundshops I found these very large hairclips …..ah ha!
Trick or Treat Hairclip
Anyway, I stuck the skulls on a double thickness of card using Ranger Glossy Accents because it dries really hard, I also used in on the back of the  card  and back of the stickers to strengthen them and to go get rid of the tackiness of the adhesive on them.
Picture 098
The whole effect is finished off with a few very sparkly flat backed gems on the bow and hair of two skeletons and in any small gaps. I have attached the whole thing onto the clip using foam pads as I have found many a time they are almost impossible to remove and no need for drying time.
Halloween Hair Slide
Using stickers in this way has made me see the potential of some of the others I have stored away.